Cisco’s Networking Academy offers a great pathway to learn aspects of cybersecurity, and as part of the second class, ‘Networking Basics’, I decided to follow the given recommendation to learn to work with the company’s packet tracing tool. First step towards that was the introductory course offered for that tool: Getting Started with Cisco Packet Tracer. This tools lets you practice network configuration and troubleshooting- both aspects that will be helpful to get more solid in for my upcoming Network+ exam.
In the tutored lab, I used the GUI to select network components from a virtual shelf, such as a router, ethernet cable or USB console management cable, and place or insert them into the appropriate location- either in a networking device or on the rack. The GUI allows you to zoom in and out, inspect the front and back of networking devices, and after initial awkwardness, began to feel more and more comfortable. It was neat to be able to correlate what I have been studying in a theoretical fashion with an applied situation. I was able to configure each of the devices and to build a network using a DHCP server, cabling, and more.
Here is a summary of the Introduction to Cisco Packet Tracer aspects covered:
In this module you learned about how you can use Cisco Packet Tracer to explore networking without having to purchase equipment or potentially disrupt an existing network. Packet Tracer (PT) simulates simple home networks, office networks, IoT networks, and even complex enterprise networks. Packet Tracer can be used to visualize a network as a logical topology and as a representation of the physical network.
This module contained several videos that you can access to help you improve your PT skills and your networking knowledge and skills. You explored additional features of PT, including configuring devices using the Config Tab, which is specific to PT, as well as learning the equivalent CLI commands to configure devices. For some end devices, the Desktop Tab gives you access to IP configuration, wireless configuration, a command prompt, a web browser, and other applications. Servers have a Services Tab which allows a server to be configured with common server processes such as HTTP, DHCP, DNS, etc.
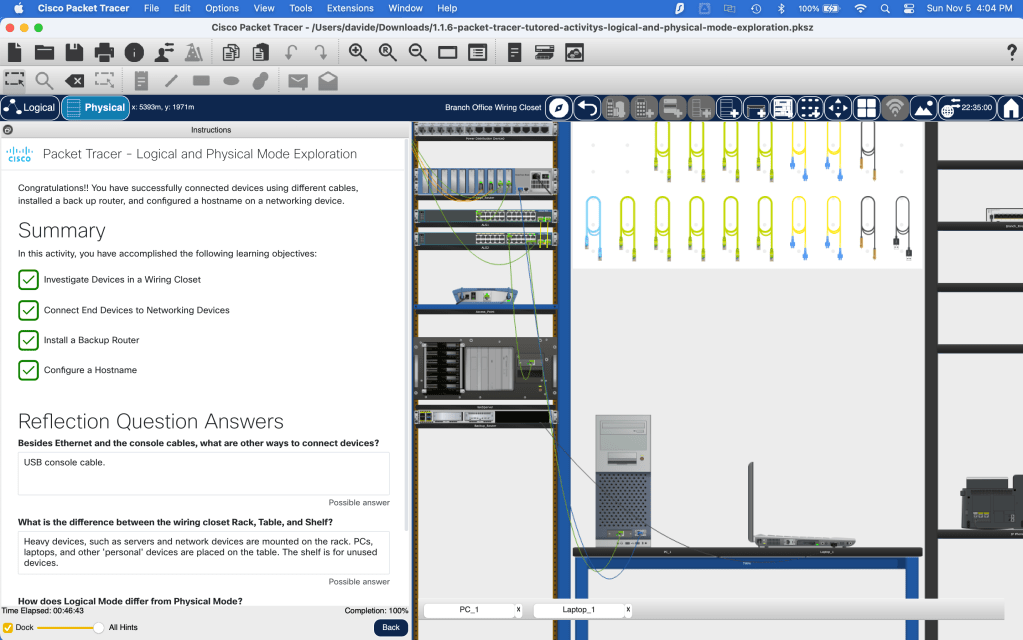
You downloaded and installed Cisco Packet Tracer so that you could complete Packet Tracer Tutored Activity – Logical and Physical Mode Exploration, which contained a hinting system and a built-in tutorial. Other PTTAs will contain hinting systems but will not have the tutorial.
In this module, you learned that there is more than one type of Packet Tracer file. These file types are used for different purposes and include: .pka, .pkt, .pksz, and .pkz.
The .pka file type is a Packet Tracer Activity file and is the file type you will experience most often. A .pka file has an instructions window. The activity is usually scored as well. This file type contains two networks: an initial network and an answer network. The .pkt file type is created when a simulated network is built in Packet Tracer and saved. A .pkt file has no instructions window or activity scoring.
You already know what a .pksz file is because you used it for the PTTA – Logical and Physical Mode Exploration in Module 1. These files bundle a .pka file, media assets, and a scripting file for the hinting system. These activities provide support, in the form of contextualized hints, for students who are working on completing the activity. The .pkz file is no longer used. You also learned about Packet Tracer Media Object (PTMO) and Packet Tracer Skills Assessment (PTSA) which are both used for assessment purposes.
This module also included instructional videos to help you complete the Packet Tracer – Create a Simple Network activity. In that .pka you used the logical mode to build a network, configure end devices and verify connectivity. And finally, another video demonstrated some of the advanced features of Cisco Packet Tracer. We recommend that you open up Cisco Packet Tracer and keep exploring!
