Right now, I’m using a Linux (CentOS) VM running on VirtualBox and my raspberry pi 3 B running next to it. The latter has a Kali distro running on it. It’s been interesting being able to play with different commands while studying from my Linux+ exam prep book!
My goal is to use LVM logical drives. For the Kali, I had to sudo apt ugrade first, before I was allowed to :
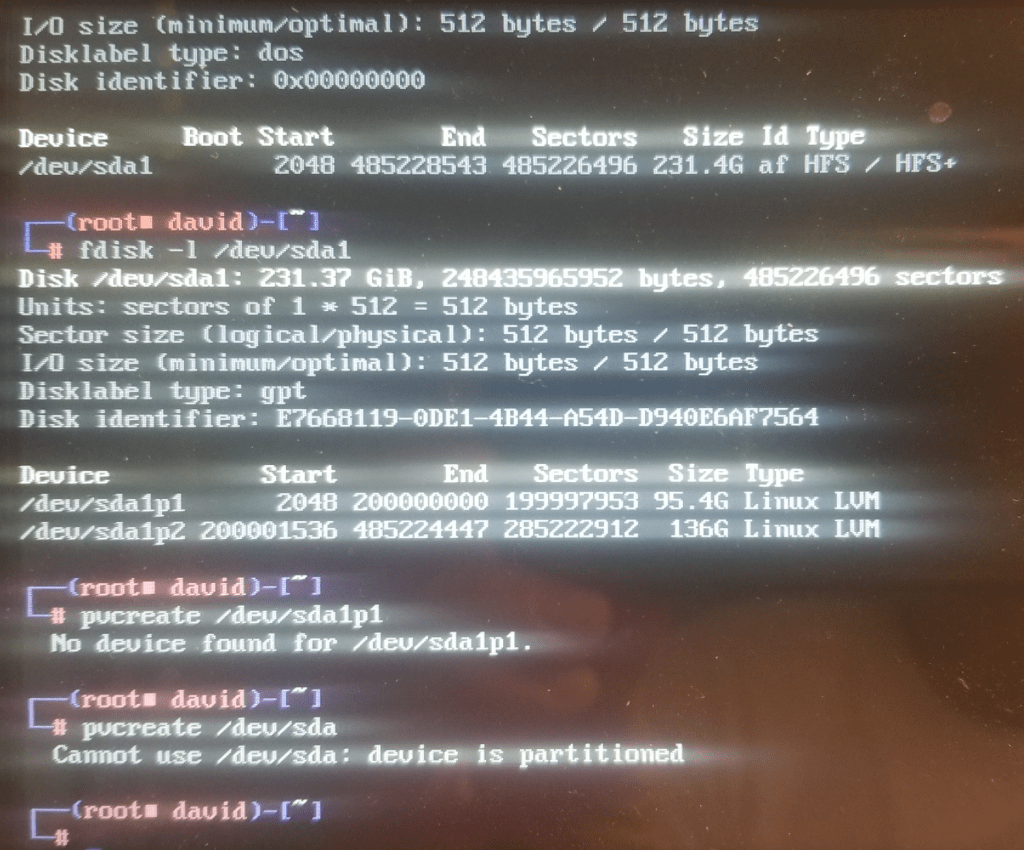
$ sudo apt install lvm2 -yThat was the module needed for running the pvcreate command (coming up in a moment). But, first, I had to select a partition that I wanted to use for this. I plugged in my flash memory stick, and then set up a GUID, created two partitions, and then set the partition type to Linux LVM, using code 8e00. Now, here is where I needed to use the pvcreate <device> command: to define those partitions as LVM physical volumes.
$ pvcreate /dev/sda1p1 // the name of my first LVM partition
Unfortunately, I received a “no device found for /dev/sda1p1” error. But! But! It’s right there, listed under $fdisk -l /dev/sda1! Okay, time to troubleshoot…
In my other post around adding a VMI hard drive, I added another 1GB virtual hard drive, created a GUID and also a Linux LVM partition type. This is part of PHASE ONE, where we need to create LVM physical volume. I have pivoted from working with the raspberry pi to the Ubuntu 22.04 VM run on VirtualBox from here on out.
After downloading lvm2, I was then able to access the pvcreate command, used to define that new HD partition as a LVM physical drive:

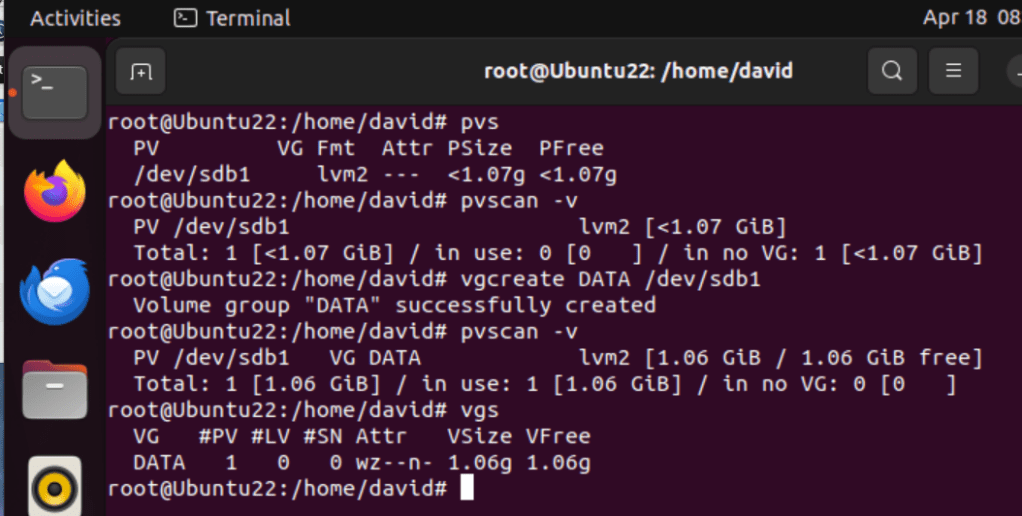
pvcreate /dev/sdbNext, I used a command to view all physical volumes on the system:
pvscan -v
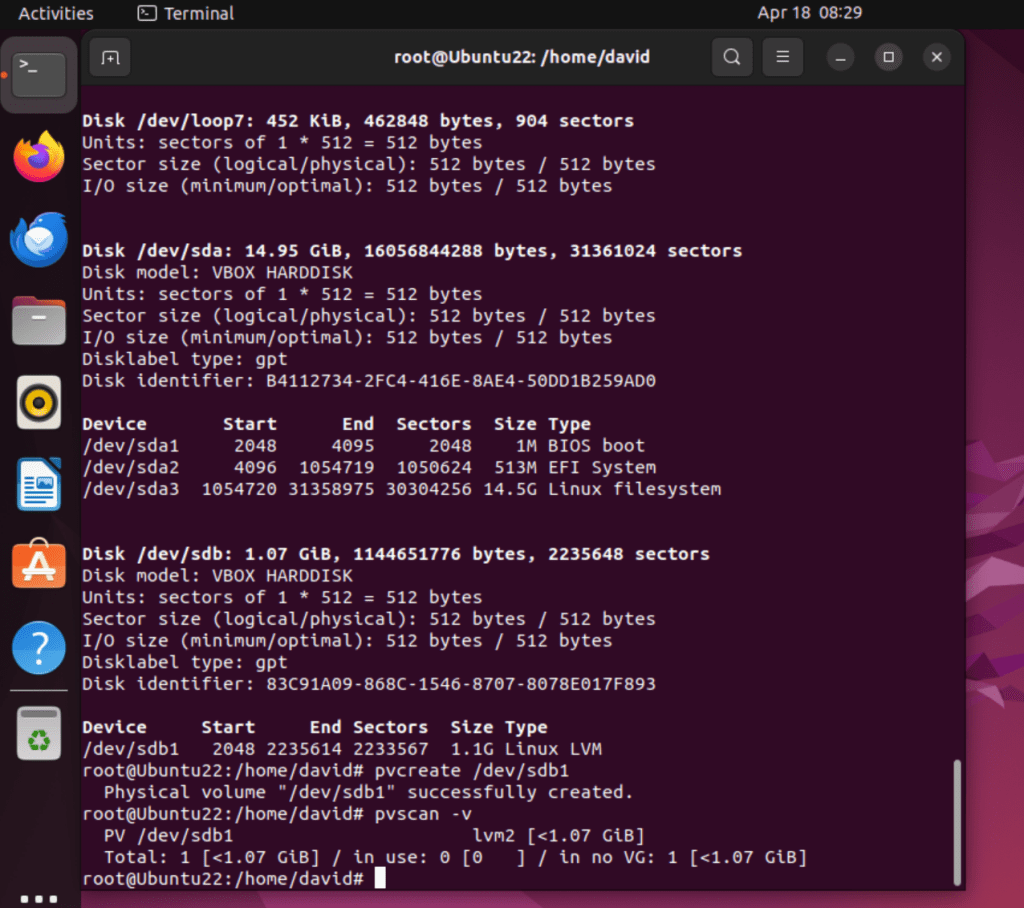
Then a command to display the physical volumes:
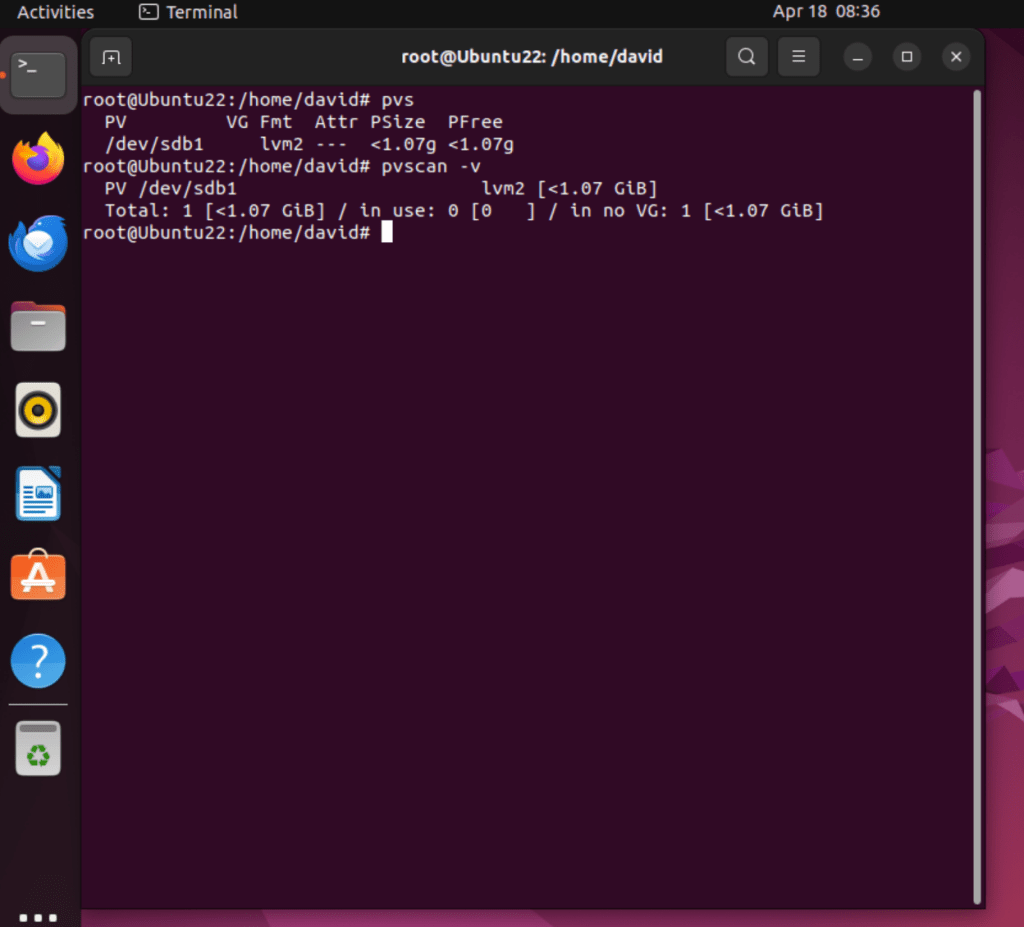
pvs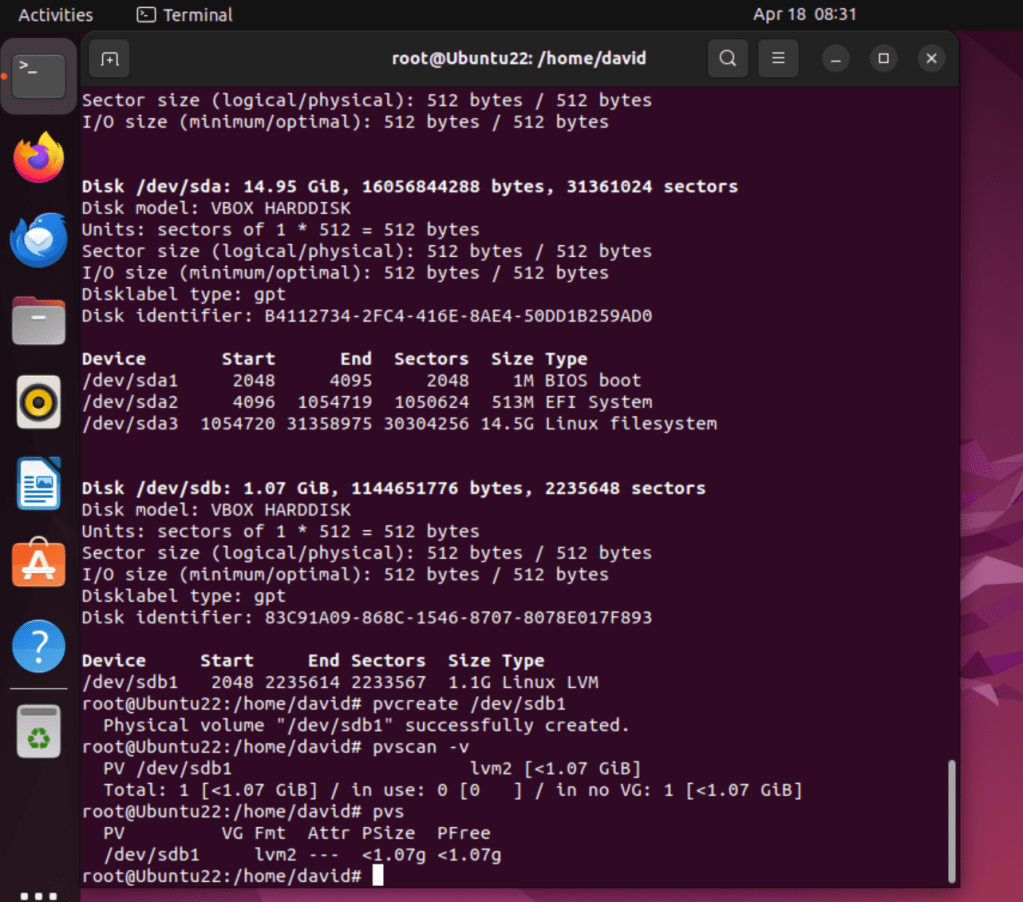
Here’s a snapshot of those two commands (pvs and pvscan -v) in action:
Now, PHASE TWO, we can create volume groups
The ‘vgcreate’ command is used to create volume groups. The syntax is:
vgcreate <volume_group_name> <physical_volume1><any others>
One physical volume was created and is a member of the DATA volume group.
Let’s try the vgs command to display the volume group:
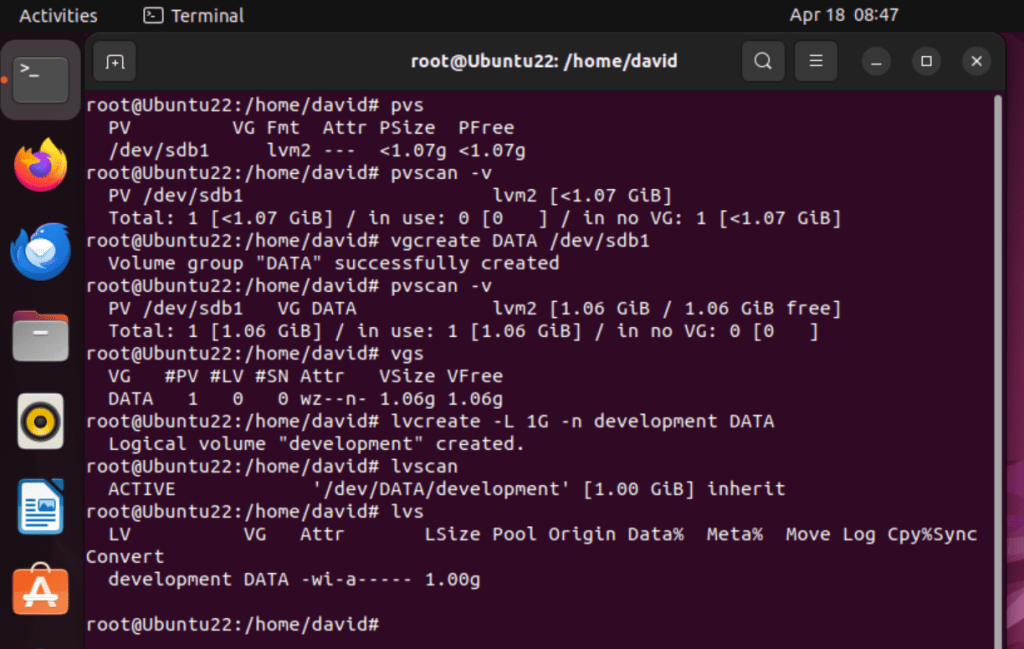
Once the volume group has been defined, we can move to PHASE THREE, which is to create logical volumes. Exciting!
The ‘lvcreate‘ command is used for this. Here, I created a 1GB volume named ‘development’, defined from the DATA volume group. I then used the ‘lvscan‘ command to view the logical volumes defined, and then ‘lvs‘ to display the logical volumes:
Now, finally, a filesystem can be created on the logical volume, using this syntax:
mkfs -t <filesystem> /dev/<volume_group>/<logical_volume>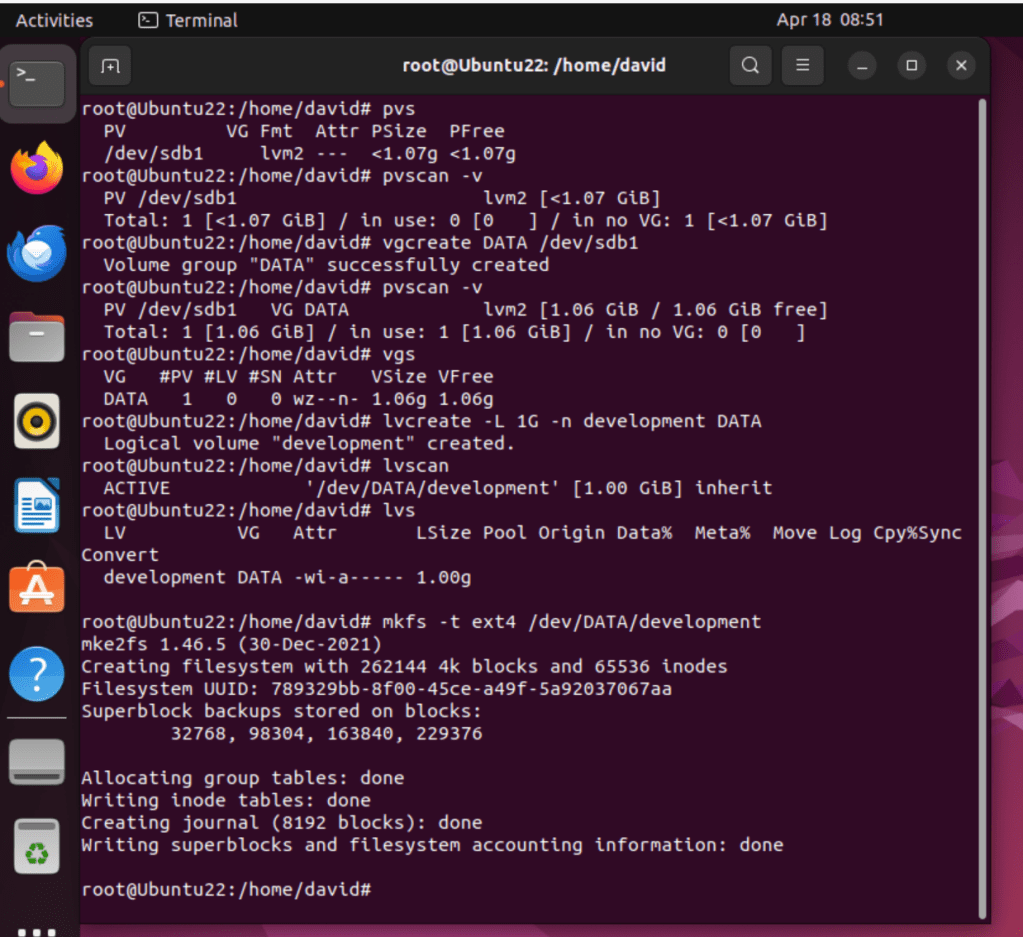
And then to mount the logical volume using this syntax:
mount -t <filesystem> /dev/<volume_group>/<logical_volume> /<mount_point>
Here I created a mount point at mnt/dev and then mounted the logical volume to that mounting point.
And to test partition and drive access:

