As I learn AWS Cloud services and how to architect solutions, I am learning that there are a variety of automation tools that will be useful to know. While developing, for example, using a CI/CD tool like Jenkins of Github Actions will be useful, and then add containers, IaC tools like Terraform and I find myself even more motivated to build up my python and bash scripting skills!
In my way of thinking, understanding the basics of GitHub Actions will be useful, before even building out my Python+MySQL DB scripts, since it will help to learn the workflow. Baby steps, building one upon the other. From what I understand, doing this while also learning containers > k9> terraform will be helpful. There’s a lot of tools, lots to learn, but trying to keep that overall plan will hopefully keep me moving forward and not going down unnecessary rabit holes.
In any case, I followed this helpful tutorial video for this exercise. Here’s what I did (you can see my repo here):
- Logged into Github
- Created a new repo titled ‘GitHubActions-demo’
- In the repo, created a folder .github/workflows
- (This was created automatically when I selected the option to create my own workflow)
- Did a google search for “github actions yaml to print hello world” and copied this into the .yaml file in the workflow folder
name: hello-world
on: push
jobs:
  my-job:
    runs-on: ubuntu-latest
    steps:
      - name: my-step
        run: echo "Hello World!"
I used an online yaml formatting tool to make sure the code was okay.
5. Commit and push changes
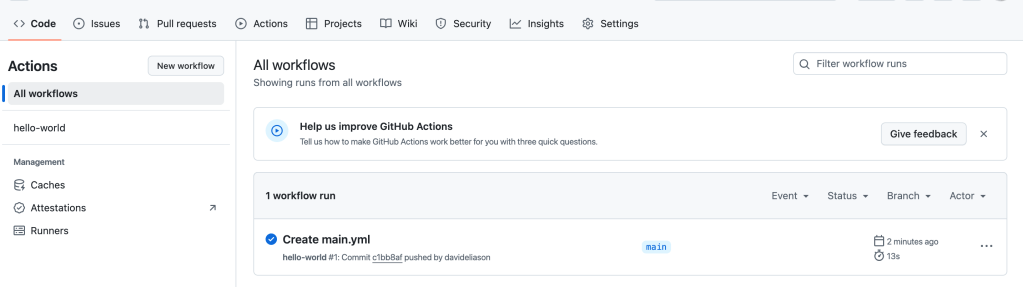
6. Go to repo main page and clicked ‘Actions’ tab and saw that the action had been invoked:
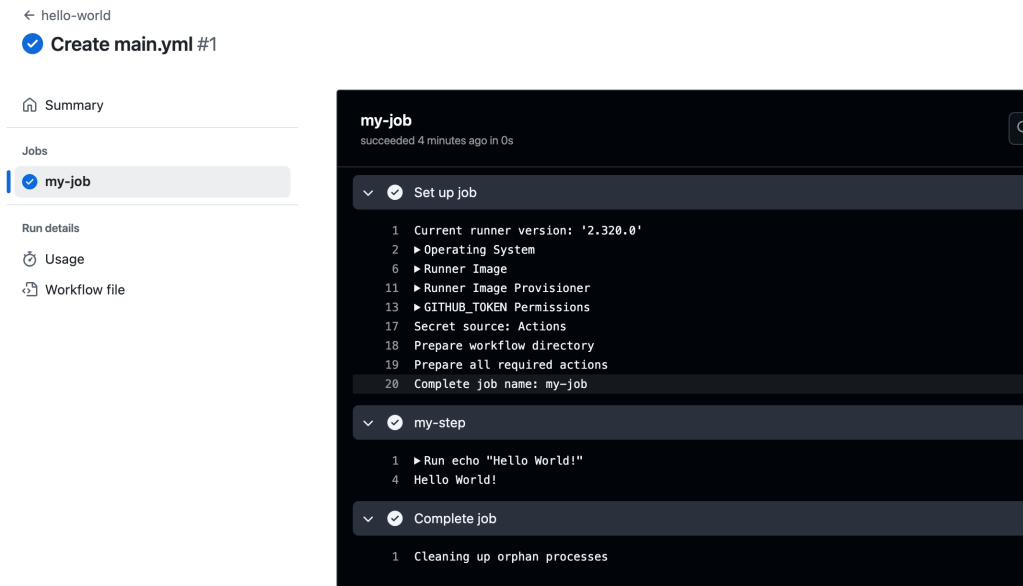
7. Selected the workflow (hello-world) from left sidebar and check the logs and results
Terms:
WORKFLOW: collection of jobs, defined in a YAMLfile
name:
EVENTS: any activity in the repo that can trigger a workflow
on:
JOBS: collection of steps
jobs:
STEPS: actions to be taken, commands, scripts
steps:
Chain Jobs-: needs
