Hi there, this is part III of posts where I explore using Terraform to first create an EC2 instance, which was then continued in the last post, ‘Terraform: Creating configurable server’. Now, let’s talk about creating an autoscaling group, because right now we just have the one server, which could be a risk if the server ever goes down. We want resiliency, and one way to do that is to build out an AS Group! Also, the cluster is elastic, and can scale up and down to meet needs, keeping usability robust. AWS service ASG (Auto Scaling Group) will take care of much of the heavylifting, monitoring the instance health, adjusting the size of the cluster, not to mention launching the instances initially.
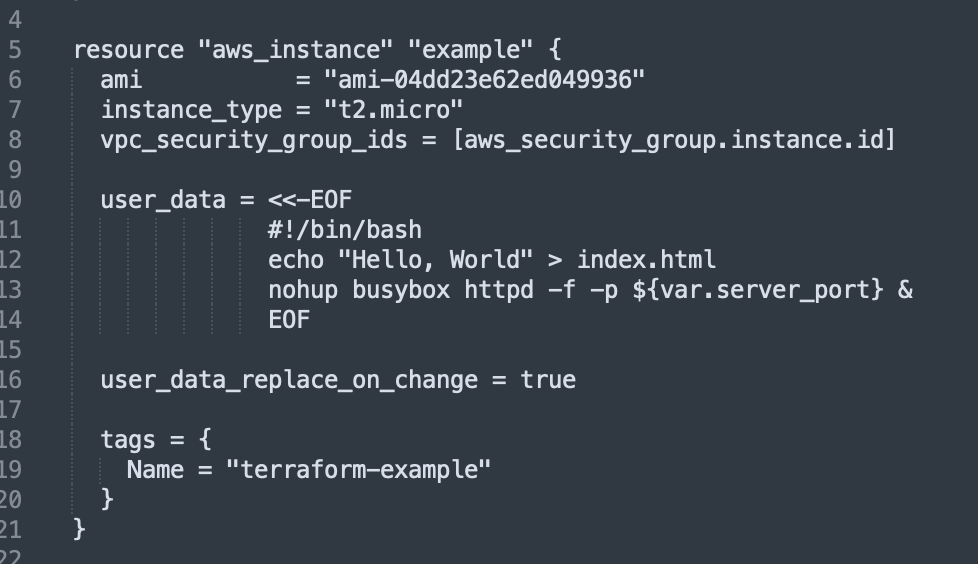
First, we need to create a launch configuration, which tells AWS how to config each EC2 instance in the group. Let’s replace this code, ‘aws_instance’:
with this aws_launch_configuration code:
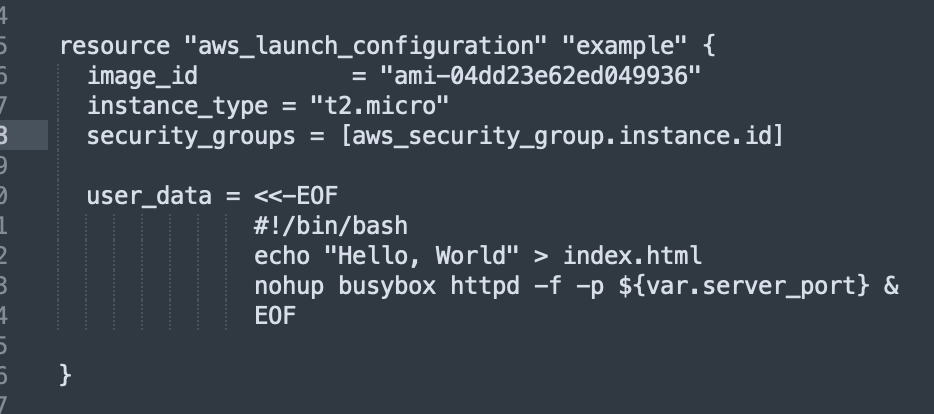
Notice that we took out the tags as the aws_launch_configuration resource doesn’t support tags, as well as user_data_replace_on_change = true. Two of the parameters’ names changed too: ami —> image_id, and vpc_security_group –> security_groups
Now, let’s use the aws_autoscaling_group resource:
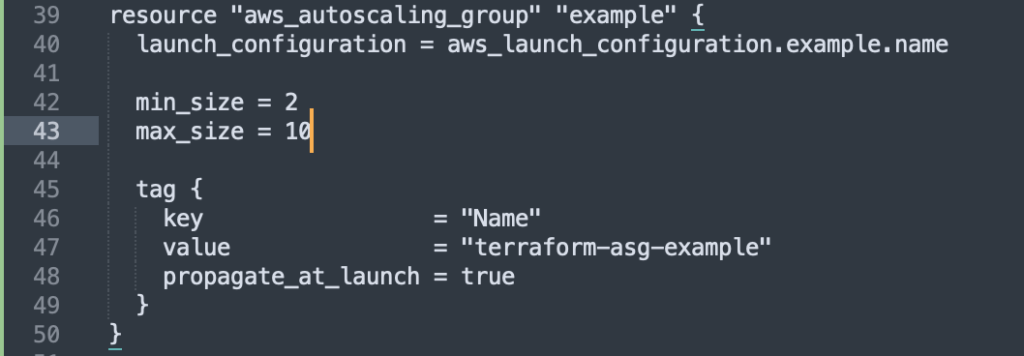
Here’s that code again:
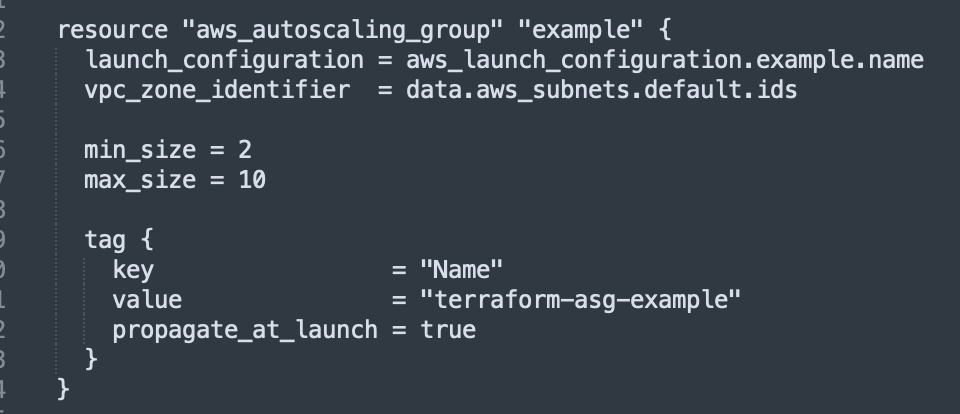
resource "aws_autoscaling_group" "example" {
  launch_configuration = aws_launch_configuration.example.name

  min_size = 2
  max_size = 10

  tag {
    key                 = "Name"
    value               = "terraform-asg-example"
    propagate_at_launch = true
  }
}
One issue that comes up is how to deal with what happens if any parameter of the launch configuration is changed – how will that effect any potential-resource replacement? That’s because the “old” resource is being referenced in the launch configuration name reference! The answer is…
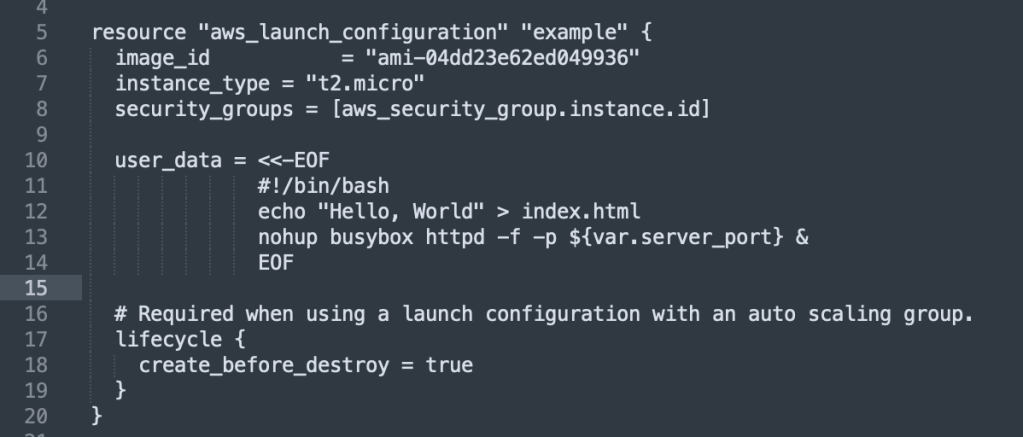
…lifecycle setttings! This configures how a resource is cfreated, updated an/or deleted. As the book states,
“A particularly useful lifecycle setting is create_before_destroy. If you set create_before_destroy to true, Terraform will invert the order in which it replaces resources, creating the replacement resource first (including updating any references that were pointing at the old resource to point to the replacement) and then deleting the old resource.”
I have to quote that because I’m still learning this myself!
Here’s that added to the code:
Typically instances will be spread out to other VPC subnets, so we need to add a parameter that will tell ASG how to do that: subnet_ids. Each subnet is in an isolated AWS AZ, so by deploying instances on several of these, it ensures that the service will keep running even if one or more of the datacenters go down. A better way to get the subnets that will be used is to use data sources to get the list of subnets in your AWS account.
A data source is read-only info from AWS every time you run Terraform- AWS provides quite a bit of info! Here the book says,
The syntax for using a data source is very similar to the syntax of a resource:
data "<PROVIDER>_<TYPE>" "<NAME>" {
[CONFIG ...]
}
Here, PROVIDER is the name of a provider (e.g., aws), TYPE is the type of data source you want to use (e.g., vpc), NAME is an identifier you can use throughout the Terraform code to refer to this data source, and CONFIG consists of one or more arguments that are specific to that data source. For example, here is how you can use the aws_vpc data source to look up the data for your Default VPC:
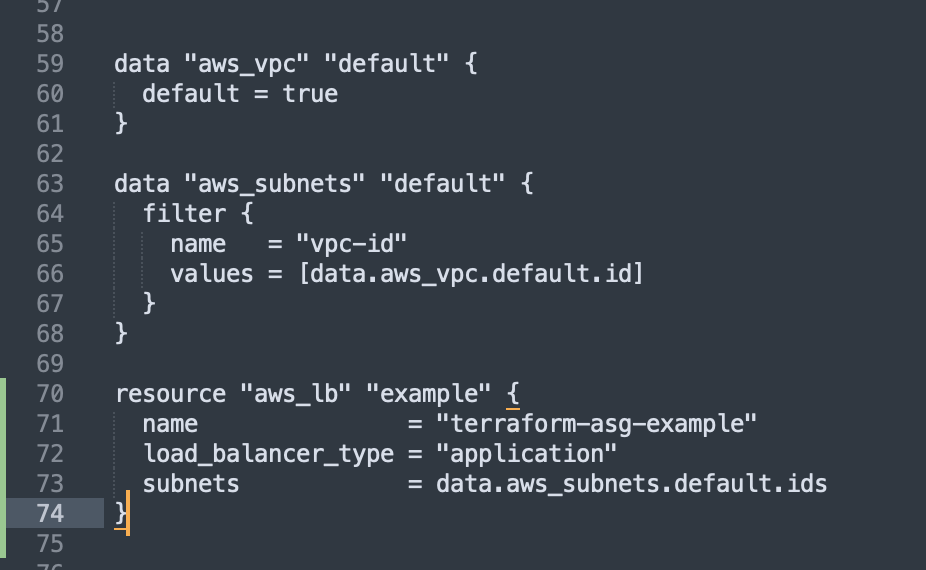
data "aws_vpc" "default" {
default = true
}To get the data: data.<PROVIDER>_<TYPE>.<NAME>.<ATTRIBUTE>
For example, to get the VPC ID from aws_vpc data source:
data.aws_vpc.default.id
and so we use that when creating a data source for aws subnets:
data "aws_subnets" "default" {
  filter {
    name   = "vpc-id"
    values = [data.aws_vpc.default.id]
  }
}
Finally, after all that work!, we will use those subnet values back in our resource for creating an ASG – those subnet data source values will be attached to the ‘vpc_zone_identifier’ attribute, like this:
Creating Auto Load Balancer
At this point, we will have a number of servers spun up in different subnets, but they will each have their own IP address, and what we want is for a ALB to create a single DNS name to give all the users. We will be using AWS’s ELB service to do the heavy lifting for us. We have a choice between ALB and NLB, but the latter is for really large numbers of requests/second, which we won’t need, so we’ll be using the ALB (Application Load Balancer).
There are three main parts of a ALB: listener (listens to a specific port and protocol), Listener Rules (parses requests for specific paths, sending request to specific target groups), and then the Target Groups themself (the servers that receive the requests from the load balancer).
Looking at Terraforms docs re: AWS is useful for sure, check out this link!
First, we create the ALB using the aws_lb resource:
Next, we define a listener using the aws_lb_listener resource:
resource "aws_lb_listener" "http" {
load_balancer_arn = aws_lb.example.arn
port = 80
protocol = "HTTP"
# By default, return a simple 404 page
default_action {
type = "fixed-response"
fixed_response {
content_type = "text/plain"
message_body = "404: page not found"
status_code = 404
}
}
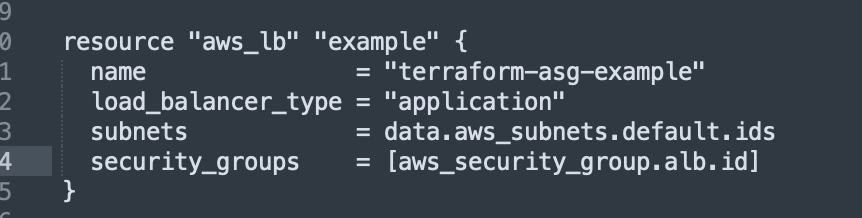
}All AWS resources,including ALBs, don’t allow incoming or outgoing traffic, so we need to create another new security group. That SG will be just for this ALB. We want to allow incoming requests on port 80 via HTTP, and allow outgoing requests on all ports so that the LB can perform health checks.
resource "aws_security_group" "alb" {
  name = "terraform-example-alb"

  # Allow inbound HTTP requests
  ingress {
    from_port   = 80
    to_port     = 80
    protocol    = "tcp"
    cidr_blocks = ["0.0.0.0/0"]
  }

  # Allow all outbound requests
  egress {
    from_port   = 0
    to_port     = 0
    protocol    = "-1"
    cidr_blocks = ["0.0.0.0/0"]
  }
}
This security group is then attached to the load balancer:
The last of the three stepsm, creating a target group for the ASG, using the aws_lb_target_group resource:
resource "aws_lb_target_group" "asg" {
  name     = "terraform-asg-example"
  port     = var.server_port
  protocol = "HTTP"
  vpc_id   = data.aws_vpc.default.id

  health_check {
    path                = "/"
    protocol            = "HTTP"
    matcher             = "200"
    interval            = 15
    timeout             = 3
    healthy_threshold   = 2
    unhealthy_threshold = 2
  }
}
This checks instance health by sending a http request to each instance only if the returned response matches the ‘matcher’ value of 200 OK response. Otherwise, the instance is marked as unhealthy and traffic won’t be sent to that instance. We can add the target group argument to point the target_group_arns which is the target group.
This is added to the resoure “aws_autoscaling_group” code: target_group_arns = [aws_lb_target_group.asg.arn] health_check_type = "ELB"
And then we tie these pieces together rby crreating listener rules using aws_lb_listener_rul resource:
resource "aws_lb_listener_rule" "asg" {
  listener_arn = aws_lb_listener.http.arn
  priority     = 100

  condition {
    path_pattern {
      values = ["*"]
    }
  }

  action {
    type             = "forward"
    target_group_arn = aws_lb_target_group.asg.arn
  }
}
We have to replace the public_ip output of the single EC2 instance with an output that shows the DNS name of the ALB:
output"alb_dns_name"{value=aws_lb.example.dns_namedescription="The domain name of the load balancer"}
If we run $ terraform apply, there is a lot of output as the resources are created and the infrastructure is instantiated:

