During my graduate studies in Information Systems, I was introduced to cybersecurity and became really interested in it. Since then, I’ve been focusing on learning cloud services and IaC, but I’m interested in pulling the security aspect in as well. To that effect, I’m going to be using Amazon Inspector and AWS Systems Manager to securing the infrastructure resources that are deployed in AWS.
Amazon Inspector runs scans that analyze all your network configurations—such as security groups, network access control lists (network ACLs), route tables, and internet gateways—together to infer reachability. Ordinarily I’d think about using pentesting tools on my Kali instance to help test for these kinds of things, but in the cloud, using these services is the way to go. Amazon Inspector serves the purpose of packetless network mapping and reconnaisance.
In this exercise, I’m going to be using the network reachability package to analyze network configs, looking for EC2 instance vulnerabilities. I’d like to learn about configuring this tool, using it to audit my cloud network assets, view and understand the scan results, update SG as needed, and log in to an instance using AWS Systems Manager Session Manager. Good stuff! Let’s start.
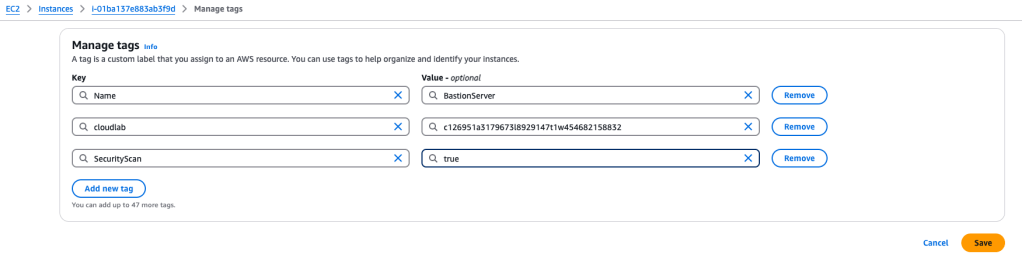
First I have to tag the EC2 instances I want to target, that will be the assessment target for Amazon Inspector Classic. I select my instance of interest, and create a name-value tag
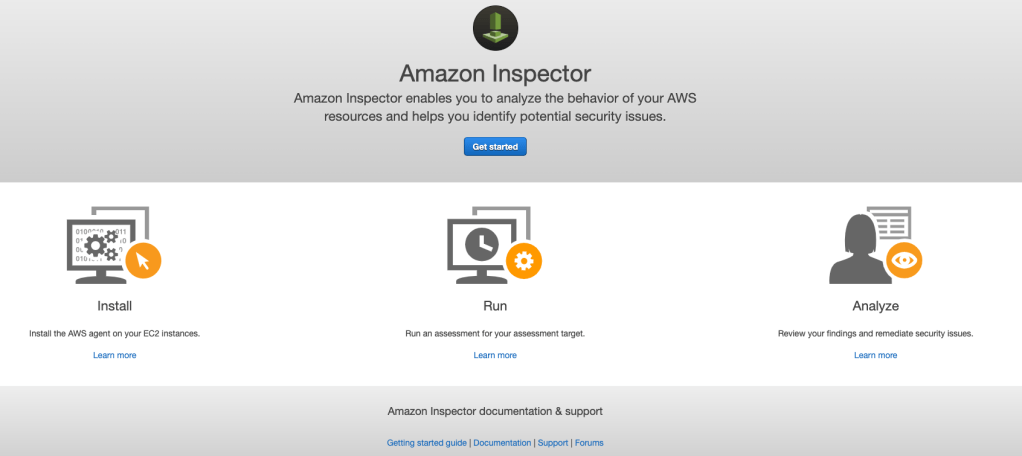
Next, I want to **configure** and run Amazon Inspector, using the network reachability rules package. Sometimes instance types won’t accept the installation of Inspector agents, so using this method bypasses that issue.
I select the service and then select ‘Inspector Classic’:
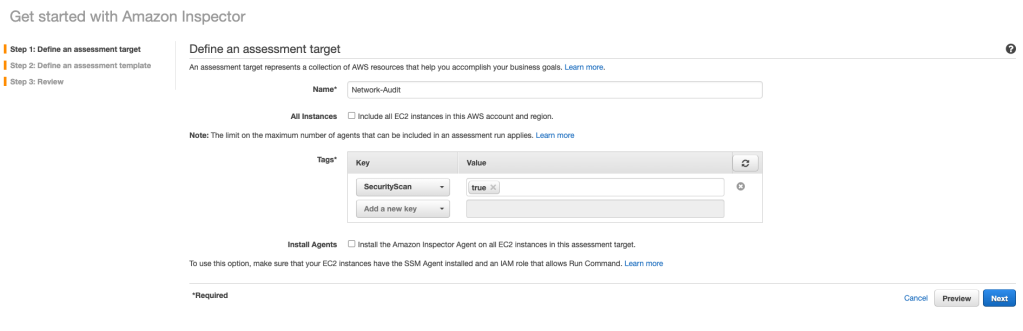
I select ‘Get Started’ and ‘Advanced Setup’. I add the key-value pair values to give the Inspector the instance scope for inspection:
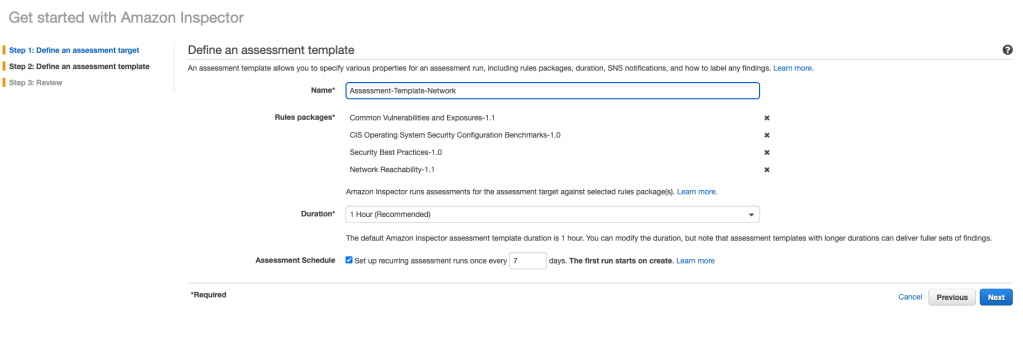
Next I create an assessment template (a blueprint that I’ll use to configure the assessment). There are a number of options available, but for this exercise, I am going to just run the Network Reachability rule package, like this (I made the duration shorter, and didn’t set up a schedule either):

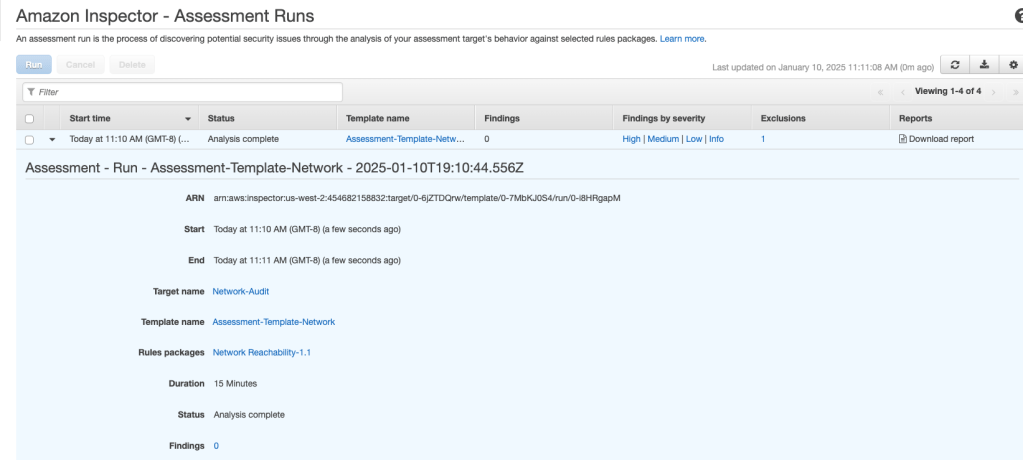
I clicked ‘Next’ and that takes me to a Review page. Looks good, so I select ‘Create’. A green-colored ‘Success!’ message comes up – this means the assessment run has been initiated. Once the analysis was completed, I opened up the findings:

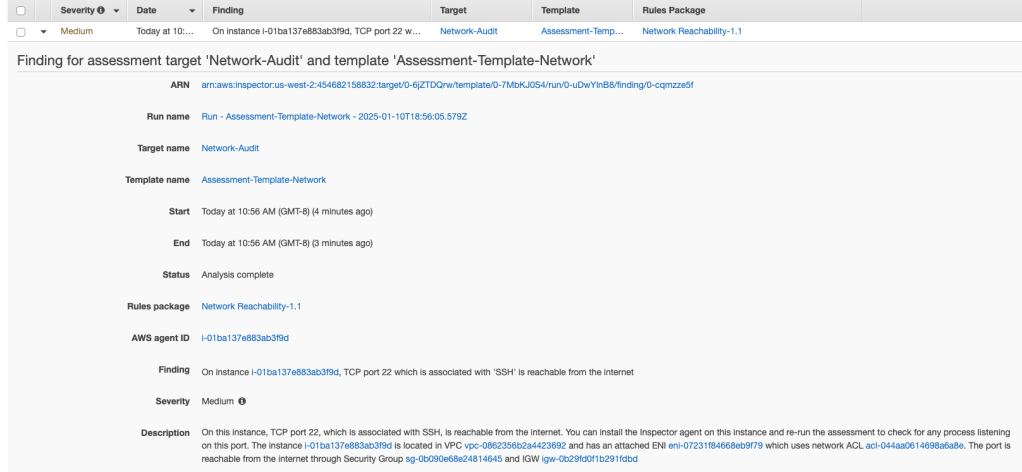
Now I get to analyze the Amazon Inspector findings! The findings that these rules generate show whether your ports are reachable from the internet through an internet gateway (IG) (including instances behind Application Load Balancers or Classic Load Balancers), a VPC peering connection, or a virtual private network (VPN) through a virtual gateway. These findings also highlight network configurations that allow for potentially malicious access, such as mismanaged security groups, ACLs, and internet gateways. Good stuff!
Let’s take a look at the first finding, with a High severity index: an open TCP port 23, which allows Telnet, is open to the public. That is a risky port to have open. That leads to the next step, of reconfiguring Security Groups and editing inbound rules:
A link to the security group in question is provided, so I click on that. Now I can edit the inbound rules by selecting the Inbound Rules tab, and editing the particular rule. I flat-out deleted the Telnet (port 23) rule, and edited the SSH rule so that instead of wide-open (“0.0.0.0/0”), I limited it so that only my IP address has access to port 22:
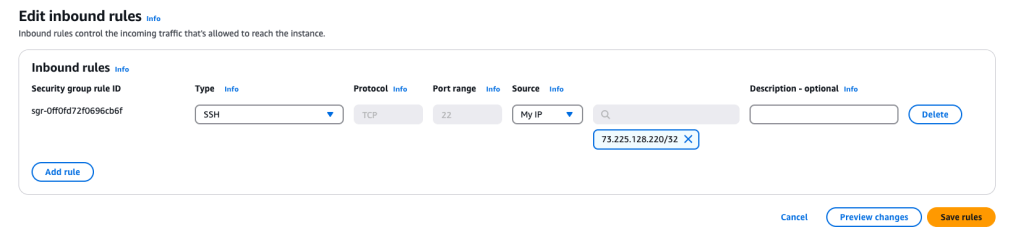
That’s much more secure!
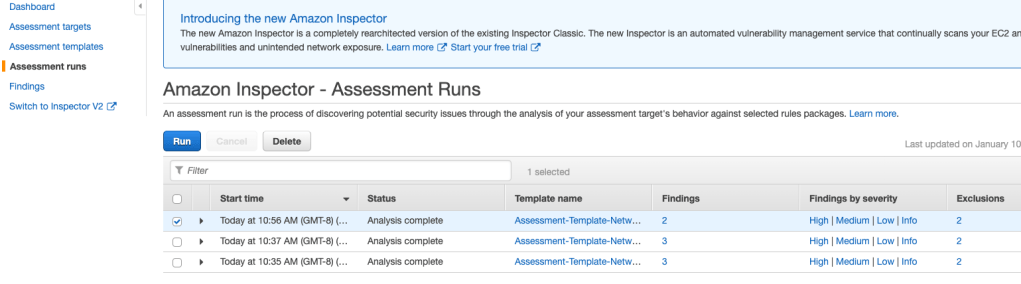
Now, I want to re-run the inspection so I select the assessment template and select ‘Run’:

Once this assessment is complete, the port 23 is open severe warning disappears, but port 22 is still technically open to the internet (even though only my IP address can access it).
The next step that I want to do is replace the bastion server, which uses ssh to connect to it, with a solution that uses Session Manager via Systems Manager. That is much more secure. Systems Manager is a secure end-to-end management solution for hybrid cloud environments. Systems Manager is the operations hub for your AWS applications and resources and consists of four core feature groups. So let’s try that out!
To do that, I select EC2 service and then Security Groups. I select the SG associated with my bastion server, and edit inbound rules – I delete the SSH rule. At this point, there are no inbound rules in the SG, the instance is not accessible. Let’s configure the instance by first stopping it:

We will bypass the need for a bastion server by connecting to the app server directly using Session Manager:
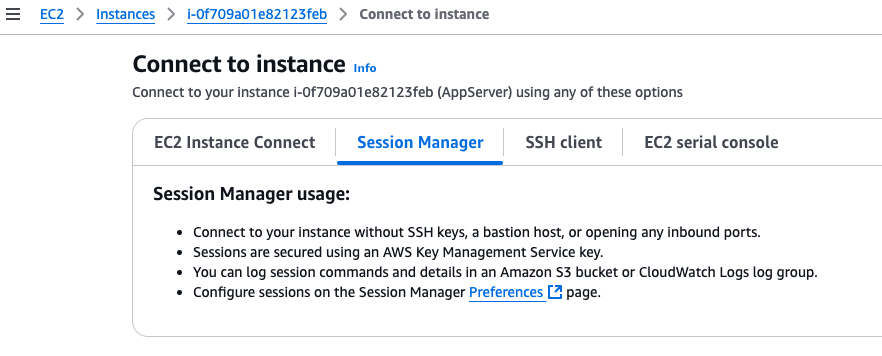
Voila! Access to the app server terminal. Nice! Let’s run the assessment again, using Inspector:
This time, there are no issues. Woohoo!
The app server allowed this Session Manager connection through creating and assigning an IAM role to that instance. In IAM services, we create a role that has the AmazonSSMManagedInstanceCore policy attached to it:
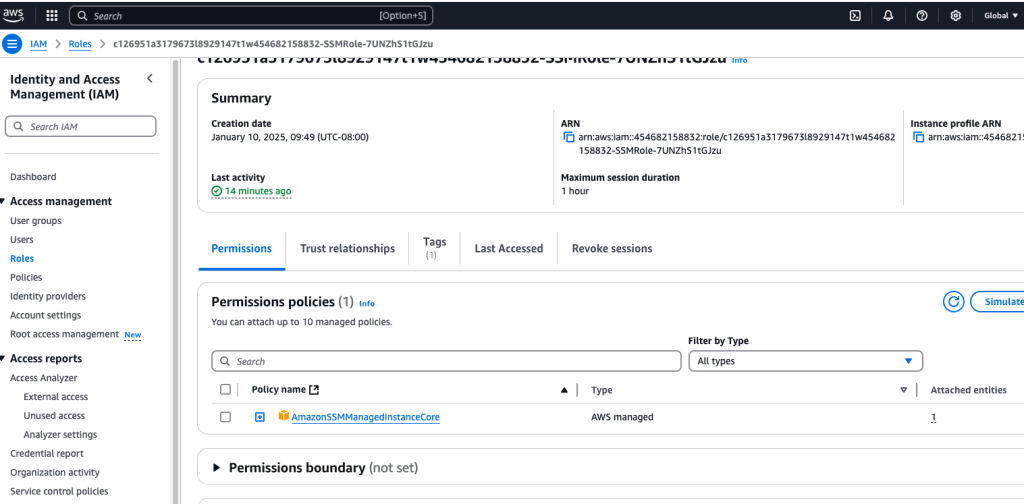
Here’s that policy:

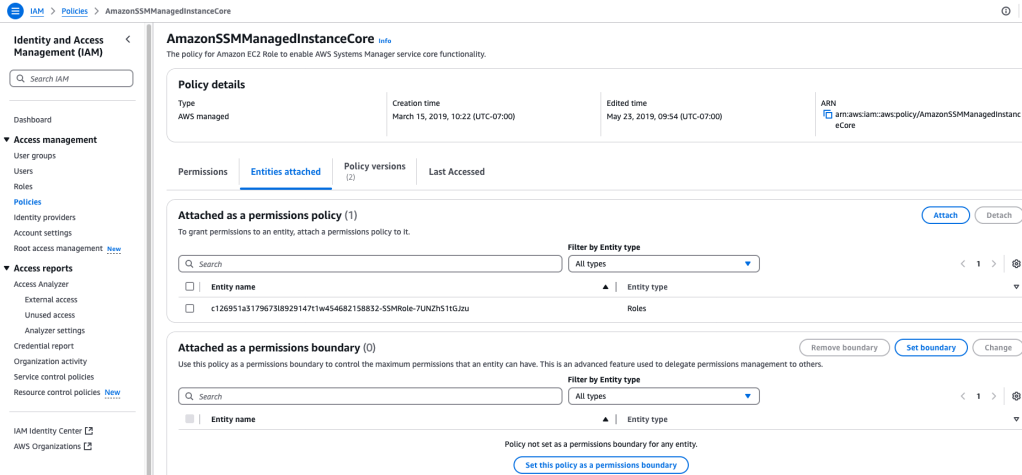
You can see the List, Read, Write access level permissions. Here’s that role reference ID:
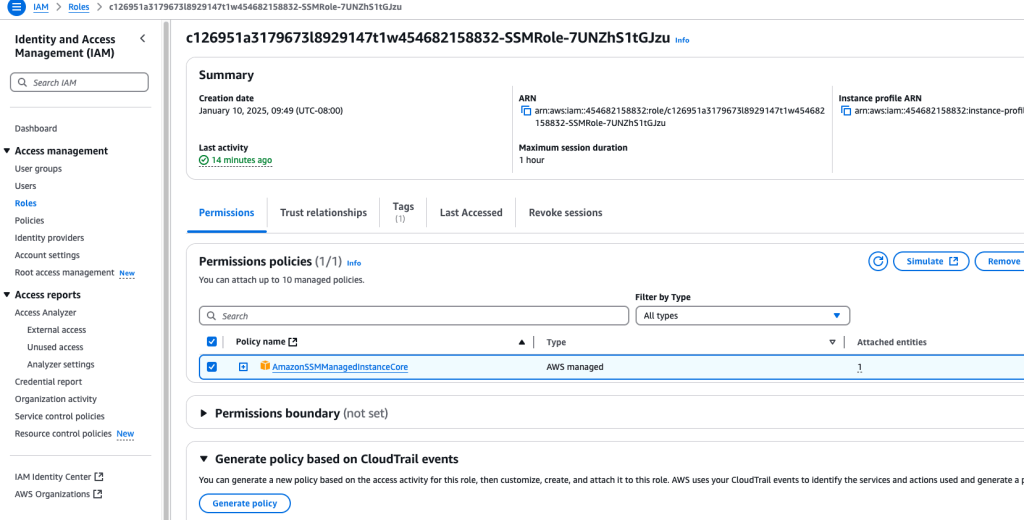
Which was attached to that particular policy:
And in the app server config details, under ‘Security’ tab, we can see the IAM Role:

Conclusion
This exercise gave me experience in working with Sessions Manager, and further experience creating and attaching an IAM role to a resource. I can definitely see how this is much more secure- not to mention saving costs associated with a bastion host!
