One of tthe challenges of mitigating vulnerabilities and building a robust defense against potential threats against networked systems includes making sure that OS and app software is up to date and patched against known vulnerabilities and security risks. Especially if there are a lot of instances involved! It’s so easy to spin up new EC2 instances (I’m looking at your, Auto Scaling Groups!), and that can lead to the challenge of ensuring that those kinds of systems are hardened.
In this exercise, I’m going to explore using Patch Manager ( part of AWS Systems Manager) to create a patch baseline, then use that to scan a test instance, and then finally patch that instance. Let’s get to it!
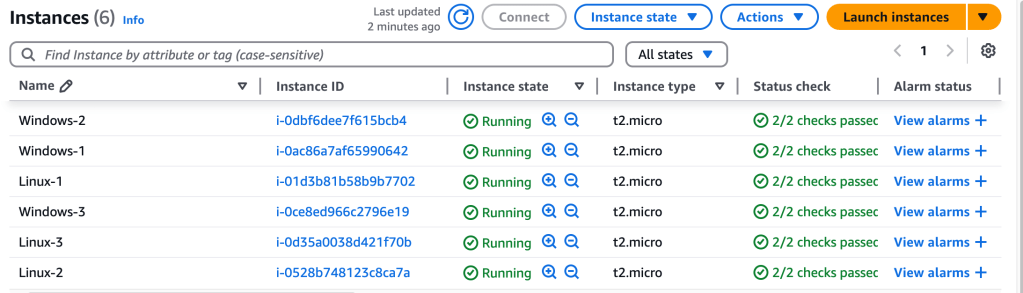
In this example, three Linux and three Windows instances have been spun up.
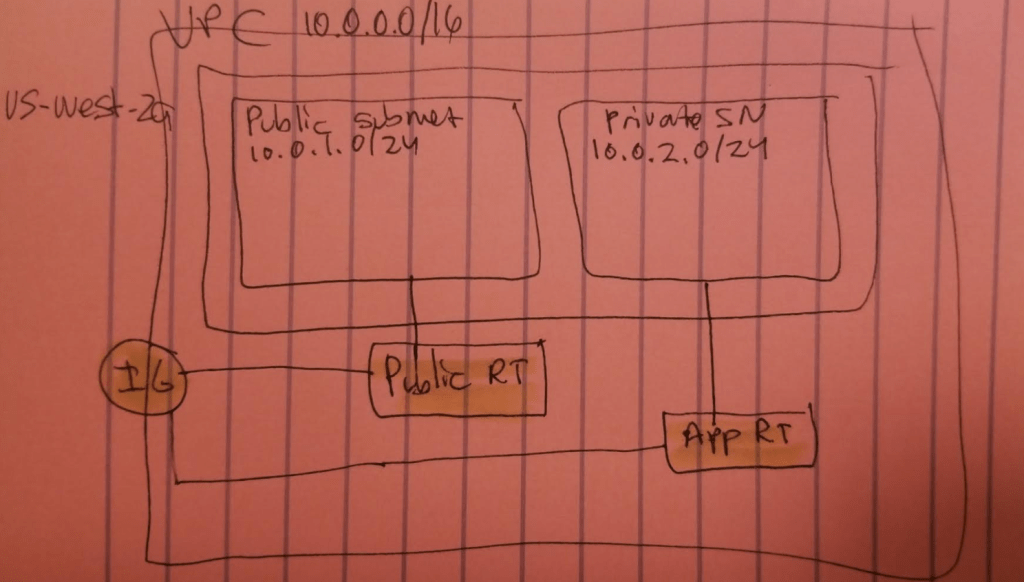
- VPC CIDR: 10.0.0.0/16 in Region us-west-2
- Public Subnet in AZ us-west-2a with CIDR range 10.0.1.0/24
- Private Subnet in AZ us-west-2a with CIDR range 10.0.2.0/24
- Public RT associated with Public Subnet
- App RT associated with Private subnet
- Both RT have route table routes pointing to IGW
- NACL for public AND private subnet: Rule 100 Allow all traffic from source 0.0.0.0/0
- All six instances are deployed within the two subnets in AZ us-west-2a, are t2.micro
Here’s a quick sketch of the resource architecture (sans the six instances to keep it clean):
First up is to patch the Linux instances using a predefined patch baseline provided by Patch Manager – just use the one that you need from the OS that it supports. You can also make your own – a custom patch baseline, but I won’t do that here.
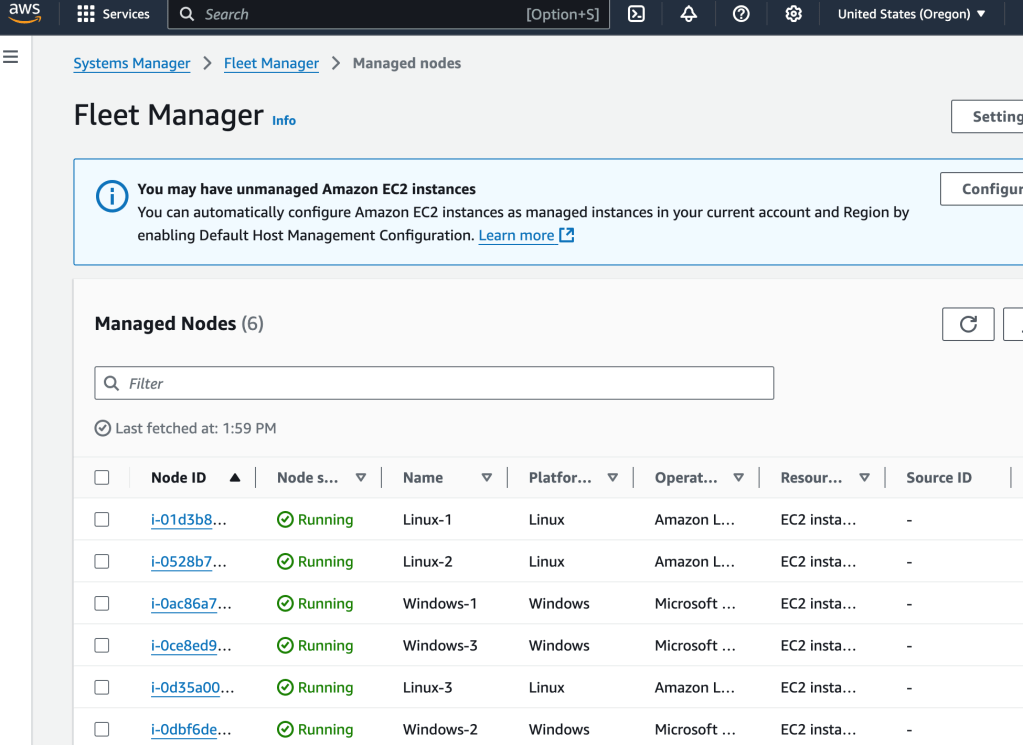
Select Fleet Manager under Node Management (Systems Manager) – here we’ll patch the instances.
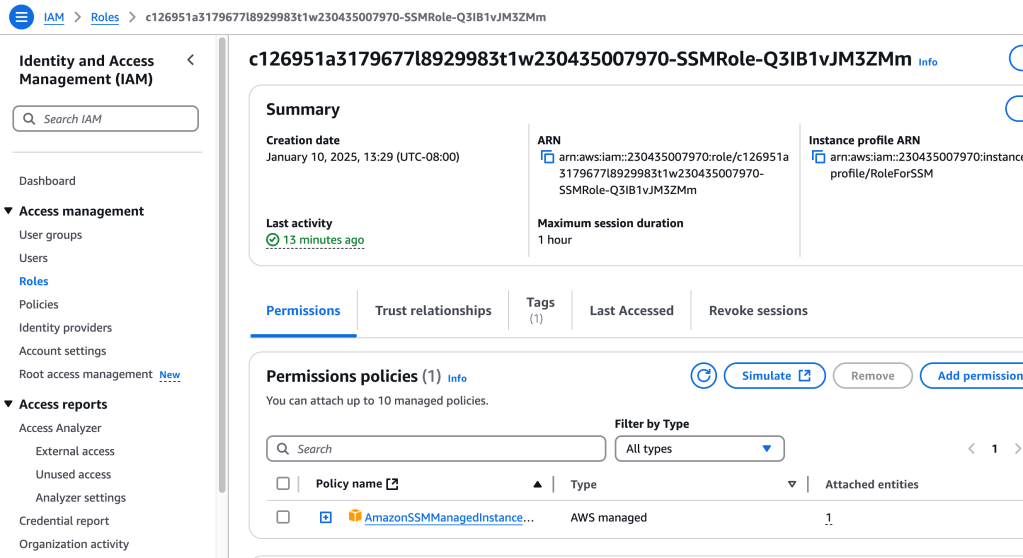
These instances can be managed using Systems Manager because an IAM role has been attached to each of them. In a previous post, where I resolved vulnerabilities of instances, I used this same IAM role to be able to access Inspector. In a similar way, this role allow Systems Manager access once again. Here’s a peek at that IAM policy (it’s the same one used for all 6 instances):
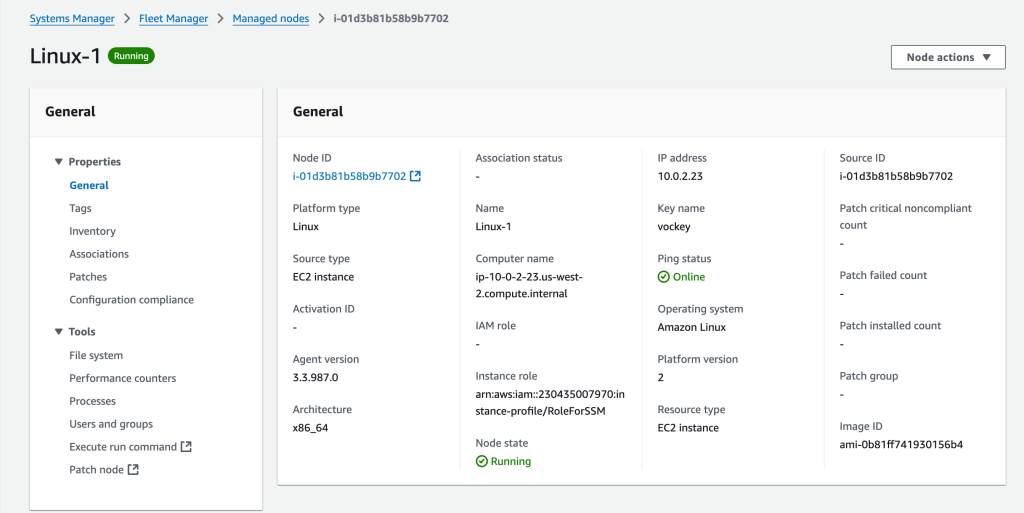
Select a node, Linux-1 here, choose Node Actions (drop-down menu) and choose Node Overview. Here you can view details about the specific instance, such as Platform type, Node type, OS name, and the IAM role that allows you to use Systems Manager to manage this instance.
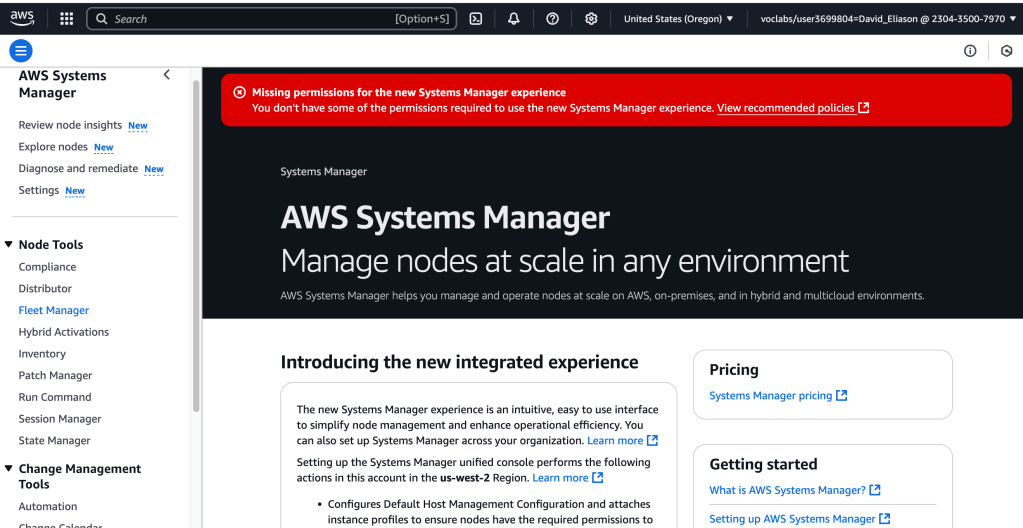
Now, moving into Patch Manager (under Node Tools), and then selecting ‘Start with an overview’. It’s interesting to note that, as the site says:
Expedite patching by creating a patch policy to apply operating system patches across the organization, and track compliance account by account.
That is really powerful! Anyways, then I select ‘Patch now’
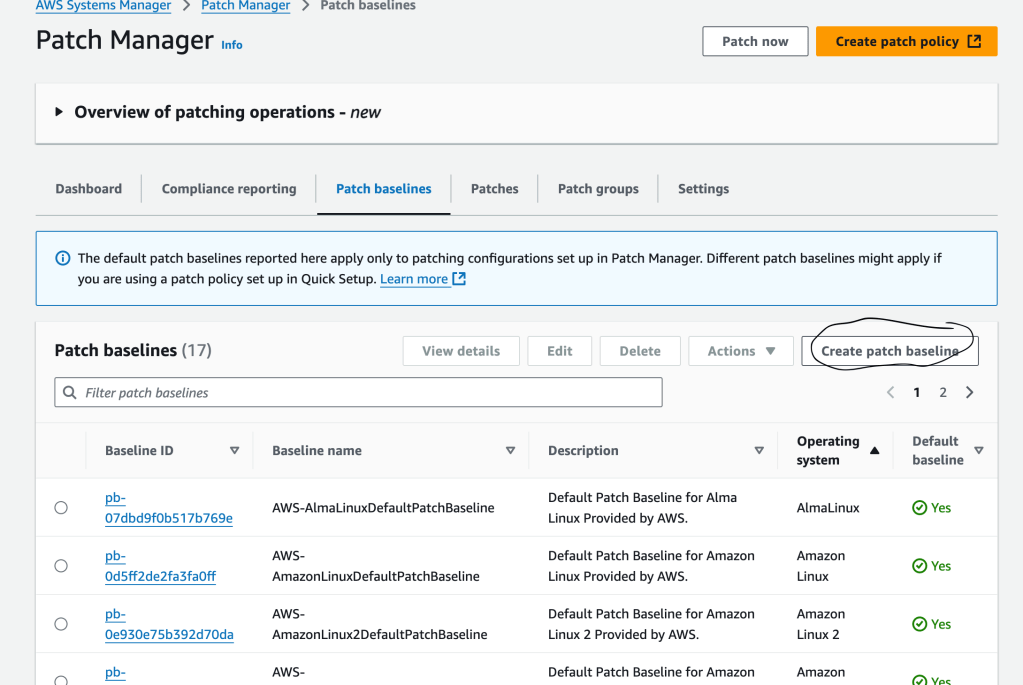
I want to patch the Linux instances with ‘AWS-AmazonLinux2DefaultPatchBaseline‘, so I search for it under the ‘Patch baselines’ tab and select it. Then, I select ‘Patch Now’ and select Basic Configuration. Here are my configs:
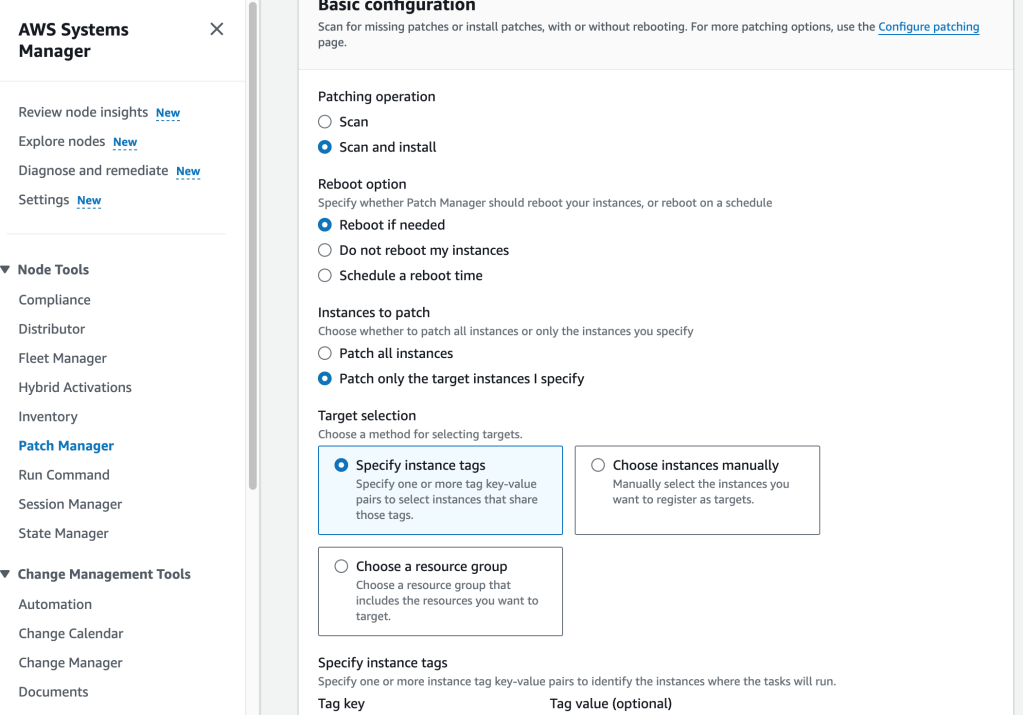
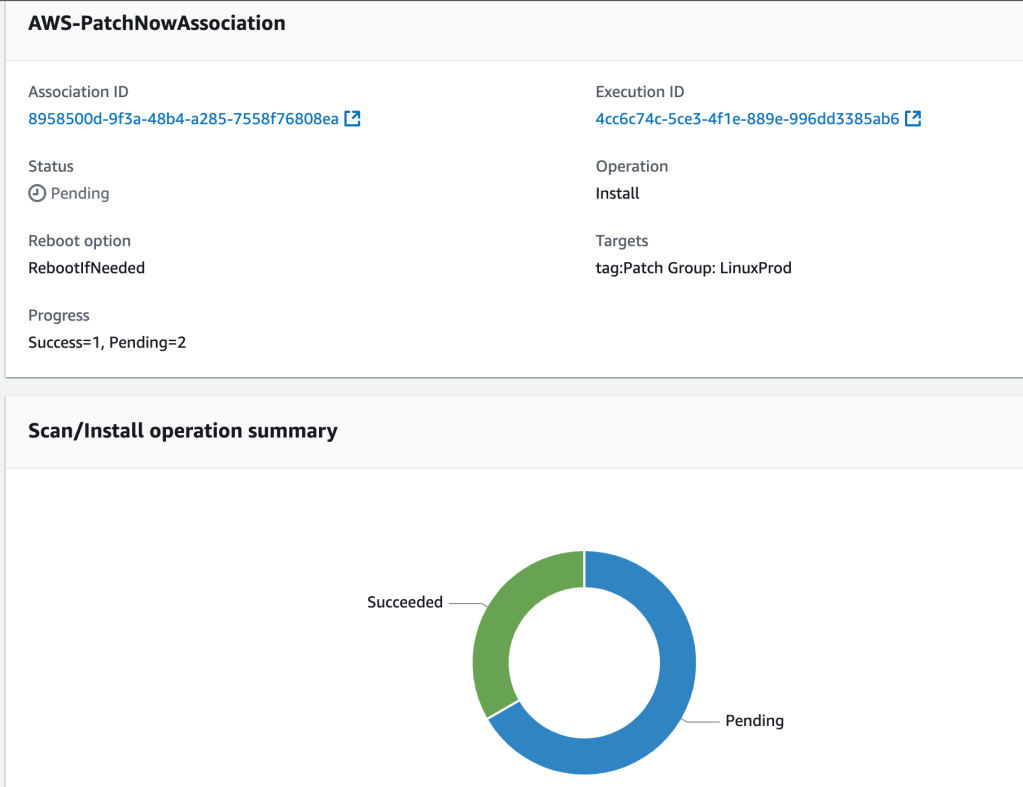
I then specify instance tags, to weed out the three Linux instances that I want to patch (tag key: Patch Group, Tag Value: LinuxProd). Then, I select ‘Patch Now‘. A new page shows the status of the three instances being affected and patched:
Now that the Linux instances have been patched, it’s time to turn the focus to the Windows instances! There are default patch baselines available for Windows instance, too, but I want to create a custom patch baseline.
Creating Custom Patch Baseline for Windows Instances
According to my textbook SAA study guide, “Each custom baseline contains one or more approval rules that define the operating system, the classification and severity level of patches to install, and an auto-approval delay.” I’ll note these when I come to them.
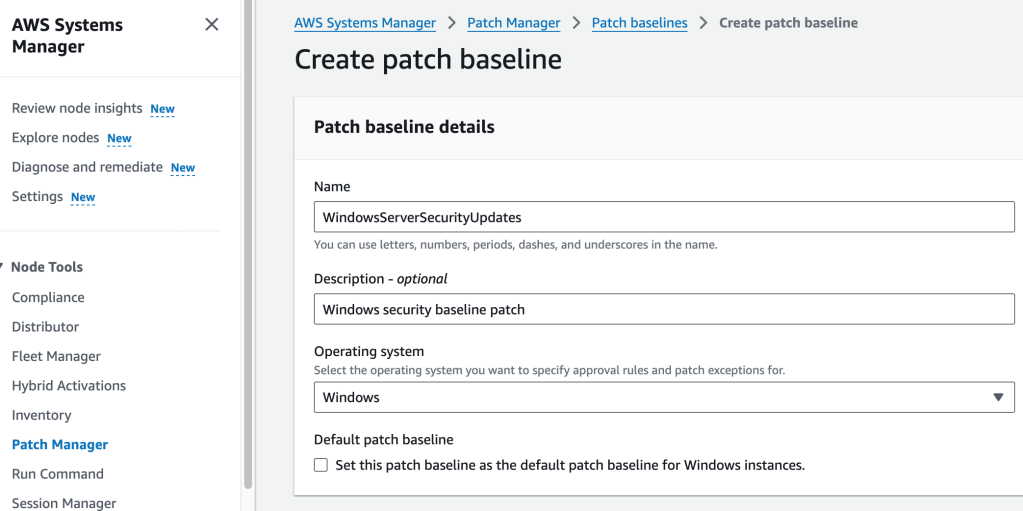
So we head back to Patch Manager, start with an overview option again, and select Patch baselines tab > Create patch baseline button. Now it’s time to configure the Patch baseline details!
Clicking that provides an opportunity to enter config details and values for the patch baseline (note here is where we give the OS value):
First rule specifies the OS of these instances, and the fact that we want Critical for severity so that service packs are included by the rule. (Note this is one of two approval rules mentioned earlier, and this is where the classification and severity levels and auto-approval values are provided):

Second rule, this time we are choosing Important for severity:

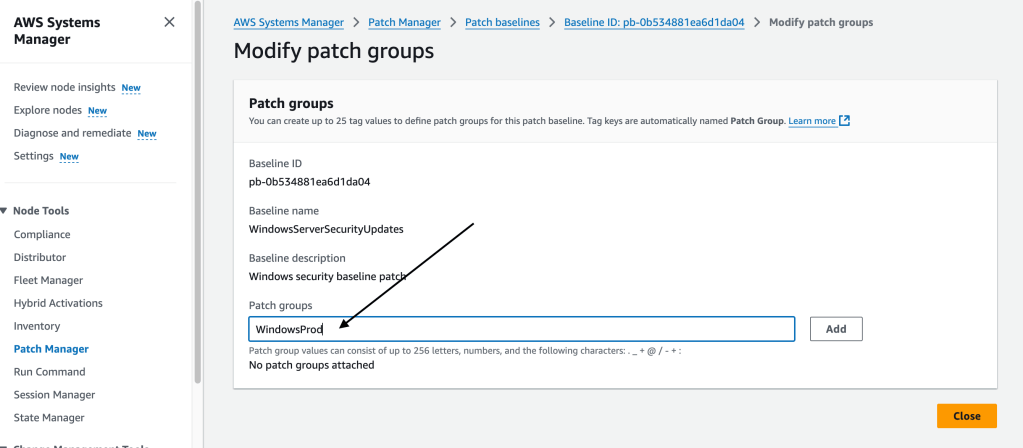
Now, this patch baseline needs to be modified to associate it with a patch group. I select the patch that I just created ( WindowsServerSecurityUpdates )

select the option to modify it

And we select the patch group of interest:
Patching the Windows instances using the patch just made
Now, it’s time to patch the Windows instances using the patch just created. We’re going to use the Patch Now feature on the tag associated with those particular instances.
From my notes: After configuration, Patch Manager uses the Run Command to call the RunPatchBaseline document to evaluate which patches should be installed on target instances according to each instance’s operating system type directly or during the defined schedule (maintenance window).
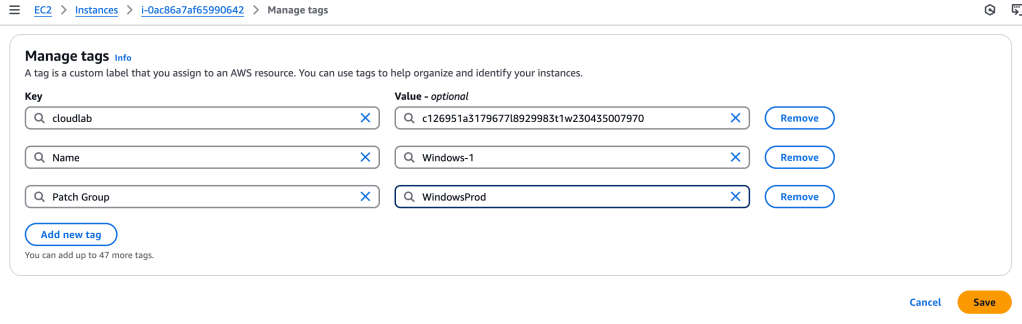
First, we need to tag the Windows instances. I add these key-value value tags to all three Windows instances.
To recap, we have created a custom baseline patch for our Windows instances, and have tagged those instances. Now we just have to run that patch on those instances.
Back in Systems Manager > Patch Manager, I select ‘Patch Now’. I enter the same config values and steps as with the Linux instances, but this time, when specifying the key-value values for the Target Selection, I specify ‘WindowsProd’ instead.
Behind the scenes, Patch Manager is using the Run Command:
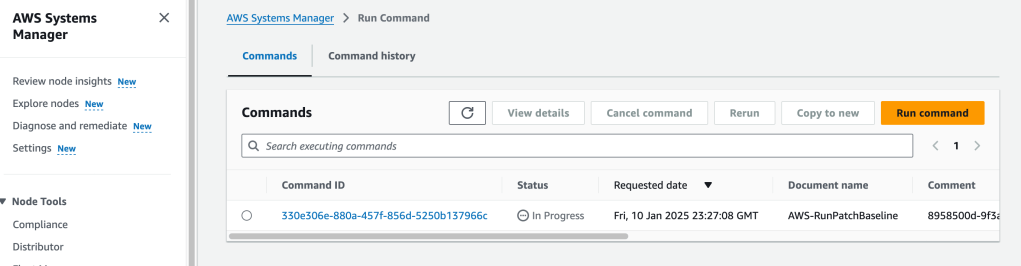
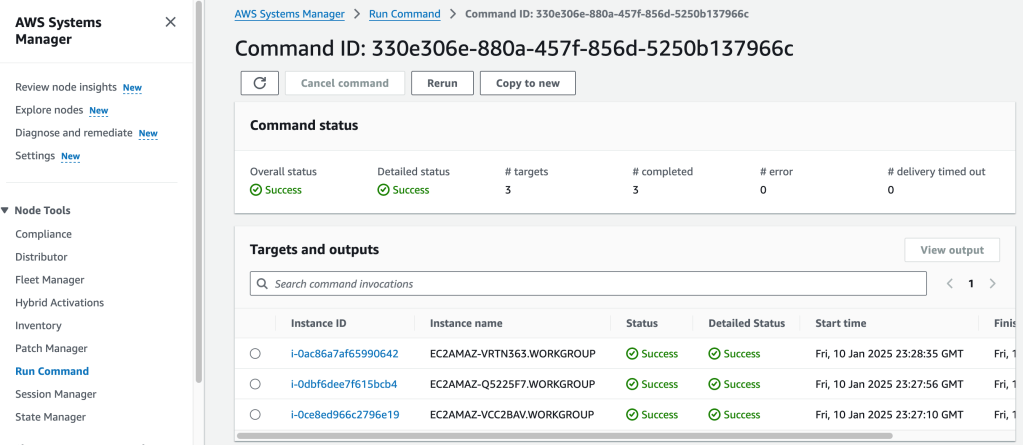
We can view the details of the Run Command:
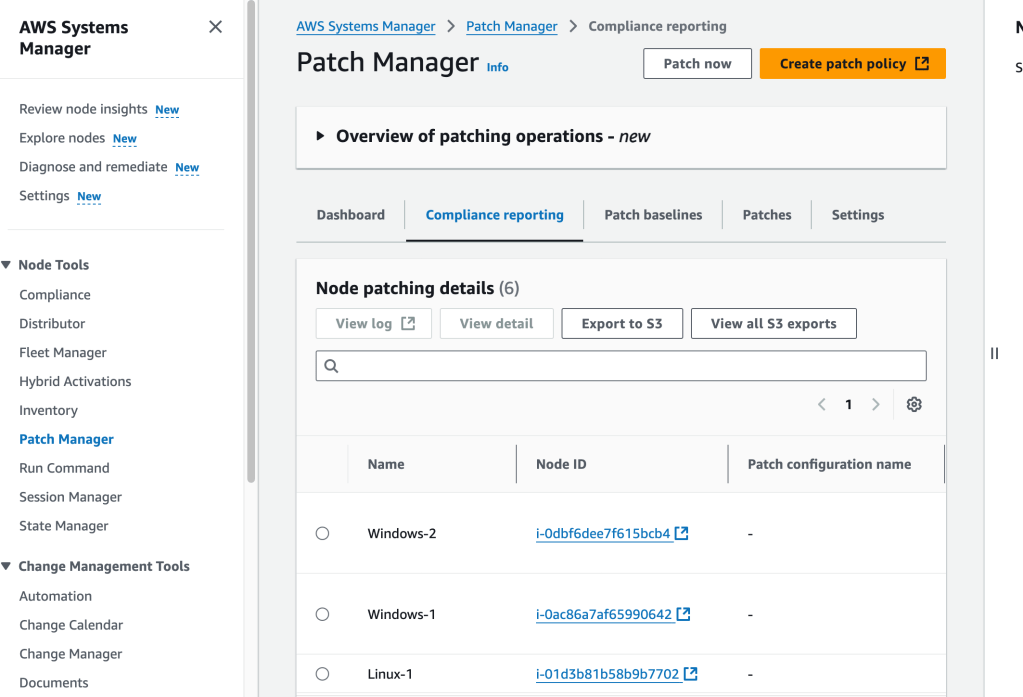
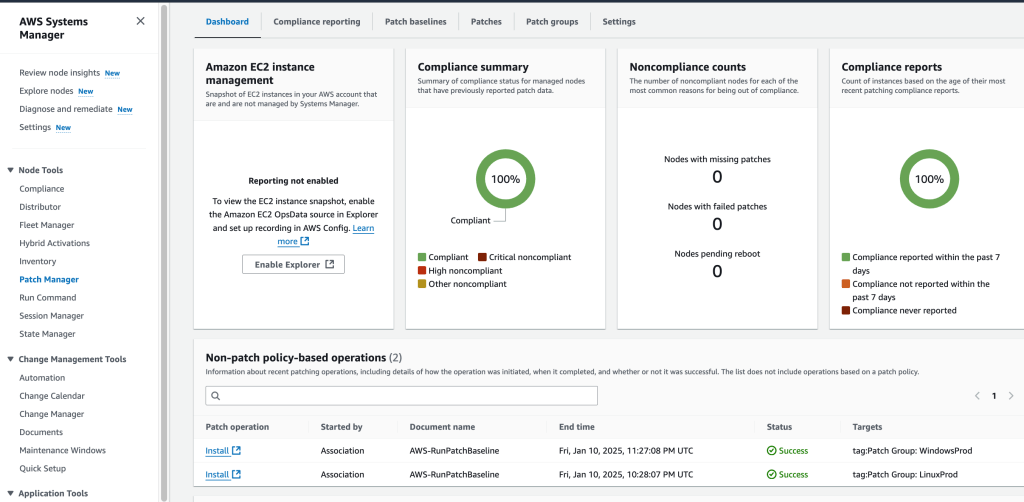
Verifying Compliance
This was a great exercise in better understanding how to use Systems Manager, and it’s child services, to harden resources. Very valuable!
