In this post, I’m going to reference a lab that I am working on- the scenario is we have a single EC2 instance running Linux OS, an Apache server, and an app with PHP (LAMP stack). The instance is doubling as a database server, which is not ideal because then we are responsible on patching, security concerns, upgrading, and so on. By moving to an AWS managed database instance, through the RDS service, then that offloads a lot of work from us.
Create Two Private SN, Database SG, and DB SN Group
First, we connect to the EC2 instance using EC2 Instance Connect. Of course, for us to be able to do that, we will have to have enabled that permission via SSM Management Service. That gives us direct access to the Linux server command-line, just as if we connected using a key-pair SSH connection.
Now, it’s time to configure the AWS CLI within the server instance.
$ aws configure

AWS Access Key: __
AWS Secret Access Key: ___
Default region name: ___
Default output format: ___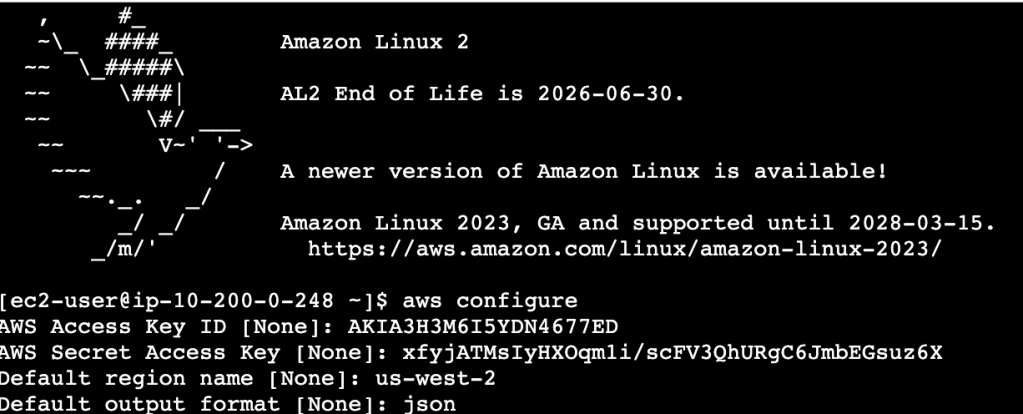
This instance will be destroyed in a few minutes so it’s ok to share this screenshot 🙂
We want to create two private subnets, a security group for the database RDS instance, and a subnet group (database subnet group)
First, we create the database security group:
This security group is used to protect the database RDS instance. It will have an inbound rule that allows only MySQL requests (using TCP and port 3306) from instances that are associated with the PracticeSecurityGroup. This rule ensures that only the server instance is able to access the database.
aws ec2 create-security-group \
--group-name PracticeDatabaseSG \
--description "Security group for Practice database" \
--vpc-id <PracticeInstance VPC ID>
Once this command is run, we will get a GroupId in the output- we will use that soon.
Next, we need to create inbound rule for the security group:
aws ec2 authorize-security-group-ingress \
--group-id <PracticeDatabaseSG Group ID> \ # the GroupId above
--protocol tcp --port 3306 \
--source-group <PracticeSecurityGroup Group ID>
Here’s what this looks like using this practice example:
aws ec2 authorize-security-group-ingress \
--group-id sg-0b836e014d3a83251 \
--protocol tcp --port 3306 \
--source-group sg-08f16afd60c44766d
I’ve created subnets a number of times using Terraform and the AWS Console, but this is an opportunity to do so using the CLI. Here I’m creating the private subnet 1 for the RDS DB. It’s in the same AZ as the server instance.
The VPC CIDR range is 10.200.0.0/20, and the public subnet CIDR is 10.200.0.0/24. I want to make the private SN CIDR range 10.200.2.0/23
aws ec2 create-subnet \
--vpc-id <PracticeInstance VPC ID> \
--cidr-block 10.200.2.0/23 \
--availability-zone <PracticeInstance Availability Zone>
In real practice:

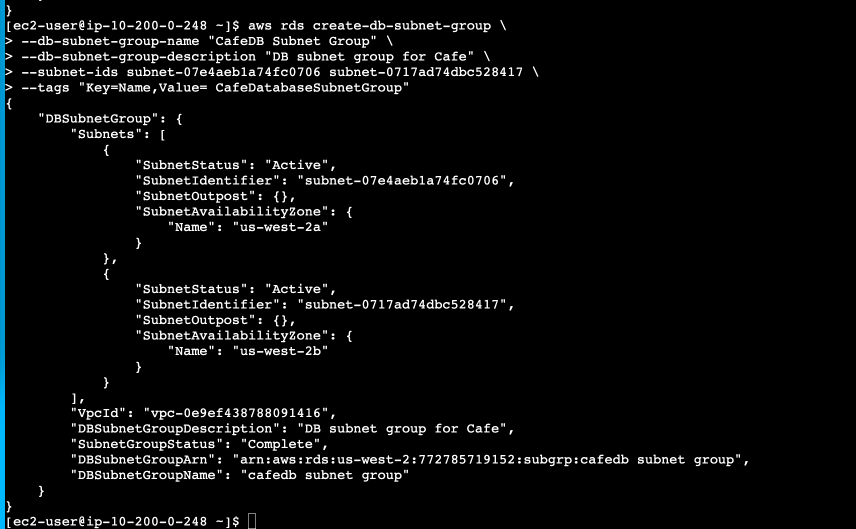
Now, to create a second private subnet, needed to create db subnet group- this is in an AZ different from the server instance, us-west-2b:

Next, time to create a subnet group for the database, which will consist of the two private subnets created. Here’s the generic code to do that:
aws rds create-db-subnet-group \
--db-subnet-group-name "PracticeDB Subnet Group" \
--db-subnet-group-description "PracticeDB subnet group" \
--subnet-ids <Practice Private Subnet 1 ID> <Practice Private Subnet 2 ID> \
--tags "Key=Name,Value= PracticeDatabaseSubnetGroup"
Here’s this implemented:
To recap, so far we have done the following:
- Create private subnet 1
- Create private subnet 2
- Create Security Group for the Amazon RDS database
- Create Database subnet group
Create the RDS database instance
We have to configure the database with the settings needed to instantiate it:
aws rds create-db-instance \
--db-instance-identifier PracticeDBInstance \
--engine mariadb \
--engine-version 10.5.13 \
--db-instance-class db.t3.micro \
--allocated-storage 20 \
--availability-zone <PracticeInstance Availability Zone> \
--db-subnet-group-name "PracticeDB Subnet Group" \
--vpc-security-group-ids <PracticeDatabaseSG Group ID> \
--no-publicly-accessible \
--master-username root --master-user-password 'Re:Start!9'
Here’s what it looks like:


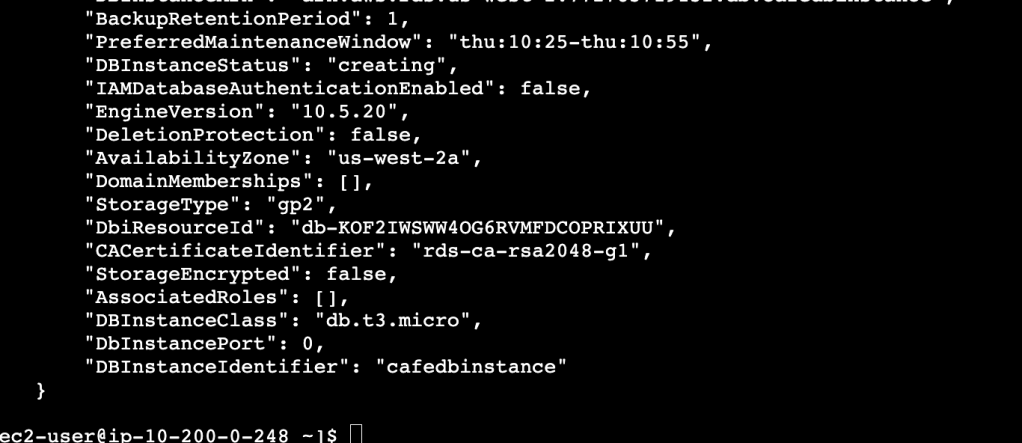
A lot of output detail!
I run this command until the db instance is ready:
aws rds describe-db-instances \
--db-instance-identifier PracticeDBInstance \
--query "DBInstances[*].[Endpoint.Address,AvailabilityZone,PreferredBackupWindow,BackupRetentionPeriod,DBInstanceStatus]"
From this, I got the following:
- endpoint address
- AZ
- preferred backup window
- backup retention period
- database status
Thankfully, after about 10 minutes, the availability is “availability”- now we can move to the next step
DB Migration to RDS
For this, I’ll need to do a couple of steps:
- connect to the instance server using EC2 Instance Connect
- Use the mysqldump to create a db backup
- restore the backup to the RDS db
- test the migration
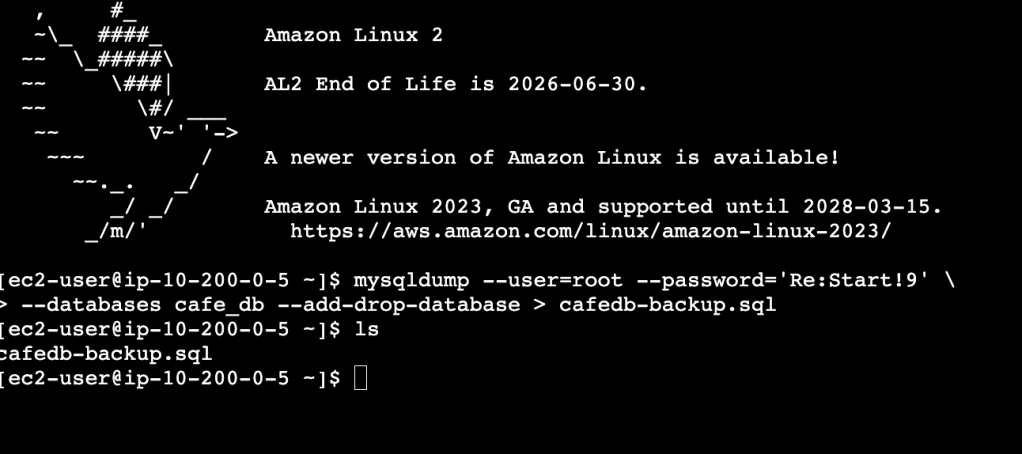
I connect to the instance server using EC2 Connect. This is the server that is running, currently, everything – the Apache server, the MySQL database.
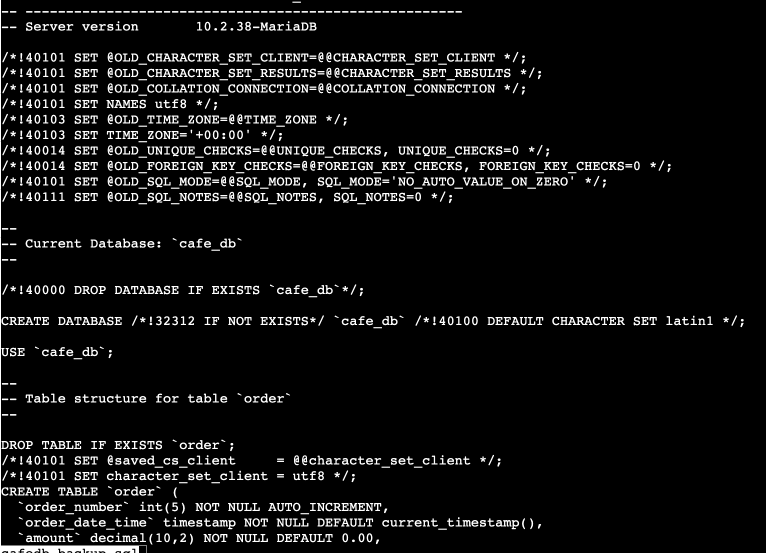
I use the mysqldump utility to create a backup of the local database. This file can be run (in the new and improved RDS database) to re-create the schema and data of this original database:
mysqldump --user=root --password='Re:Start!9' \
--databases cafe_db --add-drop-database > cafedb-backup.sql
I run this, and the backup file is created:
Here’s a snippet of that backup file:
One more command…and I gain access:
I connect to the database:
cafe_db
and I am connected to the database. Time to check out the data within:
SELECT * FROM product;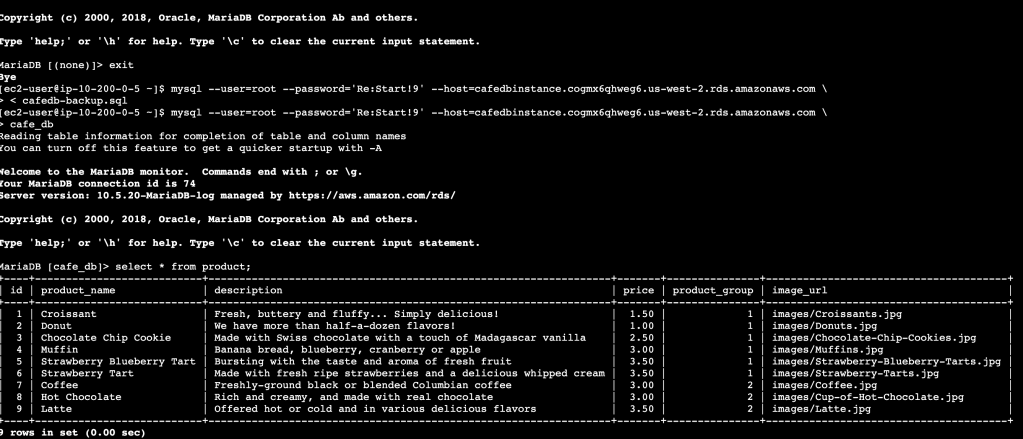
So we can see that the sqldump did indeed work in terms of recreating the table and scheme and the data, and that the RDS database instance is running.
Config the website to Use the RDS Instance
Now, we have the server instance serving the website, and we have a second database instance, an RDS database instance, containing the data. Now we have to connect the two. The database connection information is already saved within the Parameter sTore (a subset of AWS Systems Manager). We
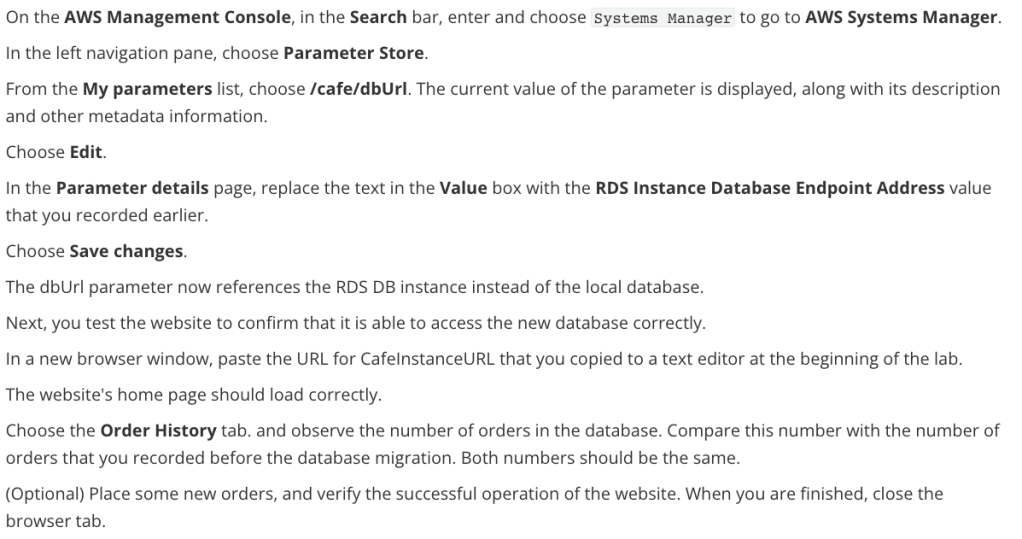
Right now, the URL to the app is like this:
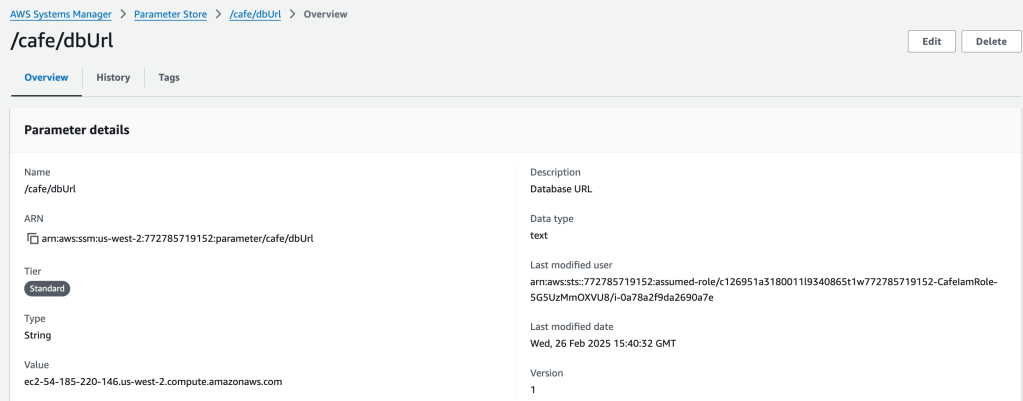

I swap out the original value with the database endpoint value
The parameter now references the RDS dB instance, instead of the local db
Let’s test it out!
I add the instance URL to the browser (this is of the server instance), and it does indeed work- the database works too. Woohoo!
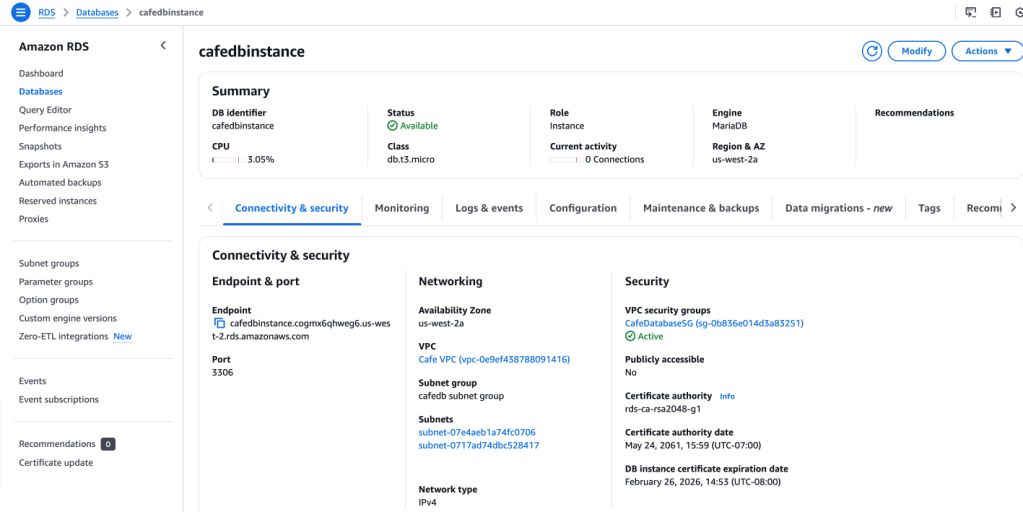
Monitoring the RDS Database
I go to the RDS section on the AWS Console, and pull up the database that was instantiated.
I select the Monitoring tab, and get a screenful of metrics and logging information. I select tthe DatabaseConnections view, and it shows 1 connection is in use:
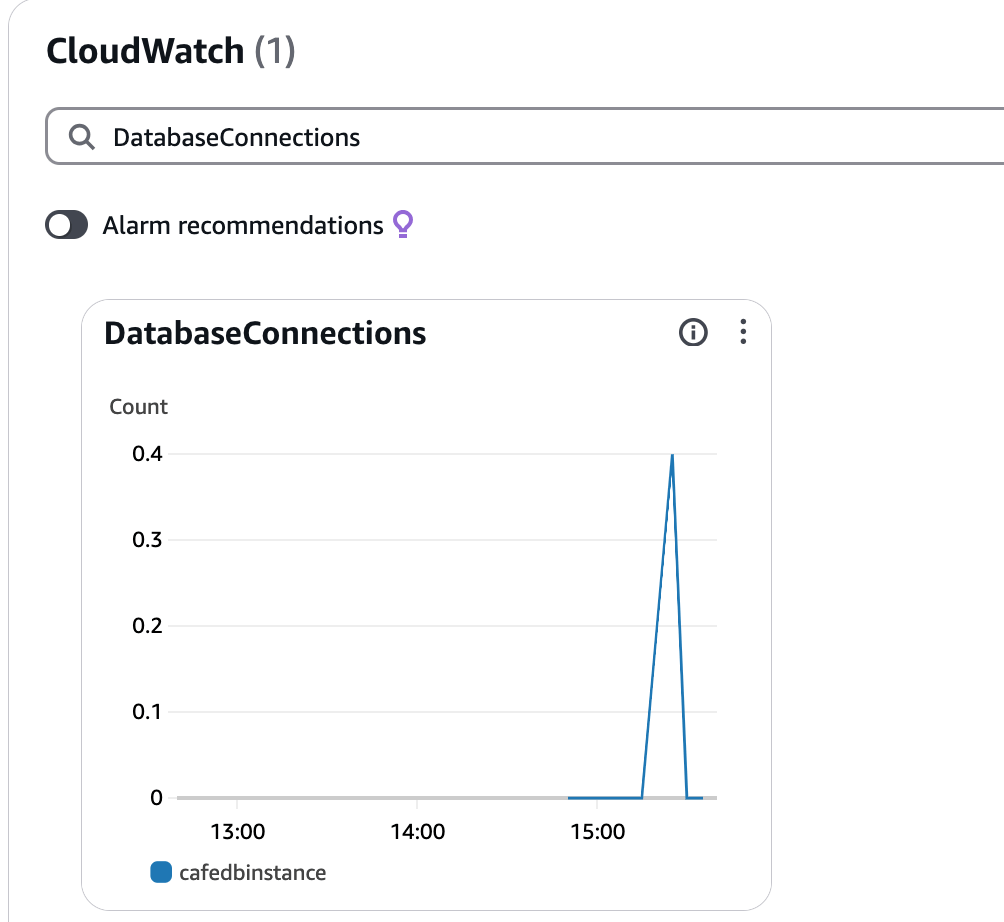
I disconnect from the database and the metrics are updated to show that there are no db connections.

